Preface
Code style is not just about aesthetics; it is a crucial component of code quality. A good code style enhances readability and reduces the likelihood of errors, thereby improving the overall quality of the software. Specifically, a consistent code style helps in the following ways:
- Improved Readability: Consistent formatting rules make the code easier for other developers to understand, which is especially important in collaborative projects.
- Reduced Errors: Standardized code style can prevent common programming mistakes, such as mismatched brackets, thus increasing code stability.
- Enhanced Team Collaboration: When team members adhere to the same code style, the code review process becomes more efficient. It minimizes communication barriers caused by stylistic differences, leading to smoother and more harmonious teamwork.
In summary, using a third-party plugin to unify code style not only improves code quality but also strengthens team cohesion and facilitates the smooth progress of a project.
Preparation
Plugin
Go to the official website (https://astyle.sourceforge.net/) and download astyle-3.4.11-x64.zip.
After downloading, extract it to any drive. In this guide, I chose to place it in the root directory of my Qt installation, as shown in the image below.

Installation and Configuration
Open Qt Creator and go to the main interface. Click on Help in the menu bar, then select About Plugins… from the dropdown to open the plugin manager.
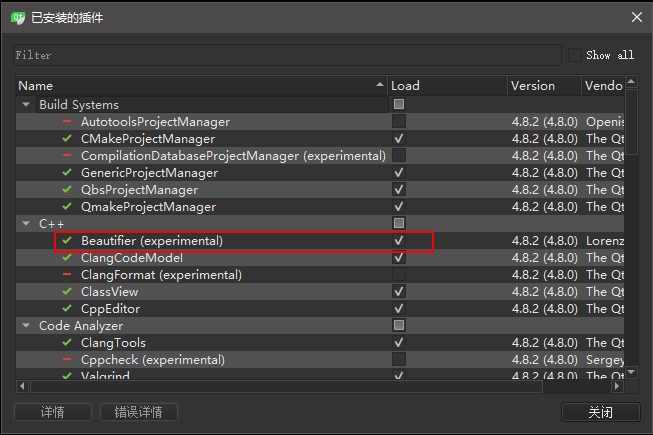
Check the Beautifier item and restart the application.
After restarting, navigate to Tools -> Options to open the configuration dialog. Find the Beautifier section you just enabled.
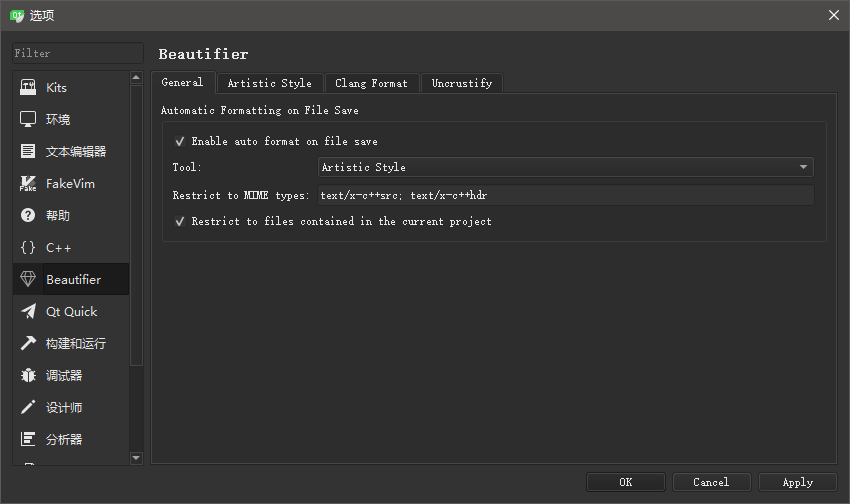
You will see that the Beautifier supports three formatters: Artistic Style, ClangFormat, and Uncrustify. This article only covers the first one.
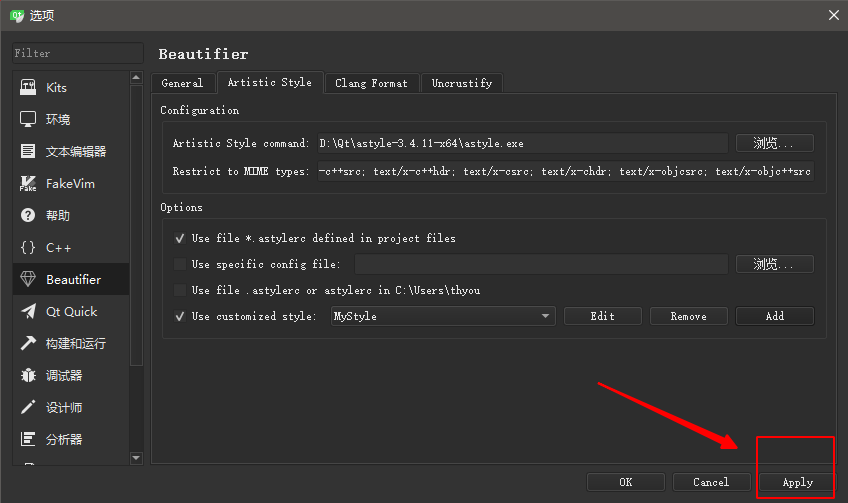
Click on the Artistic Style tab, browse to select the path of the extracted astyle-3.4.11-x64 folder, and check the Use custom style option.
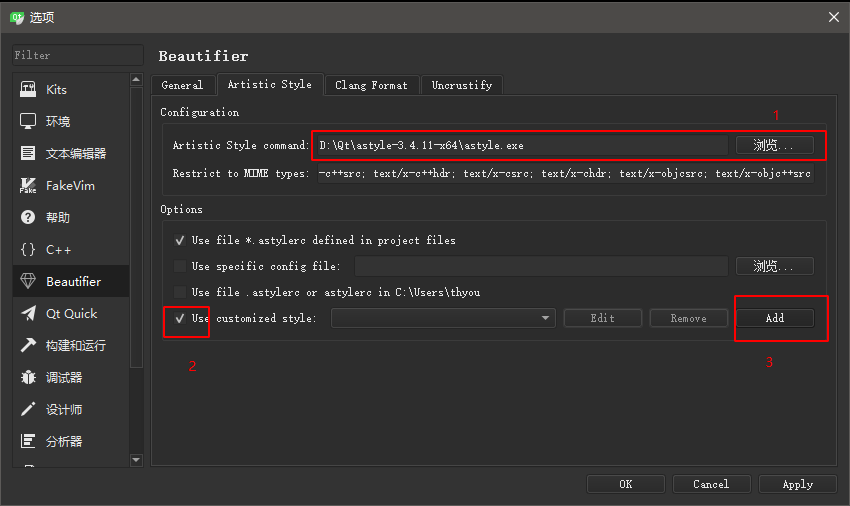
Click the Add button to open the configuration dialog.
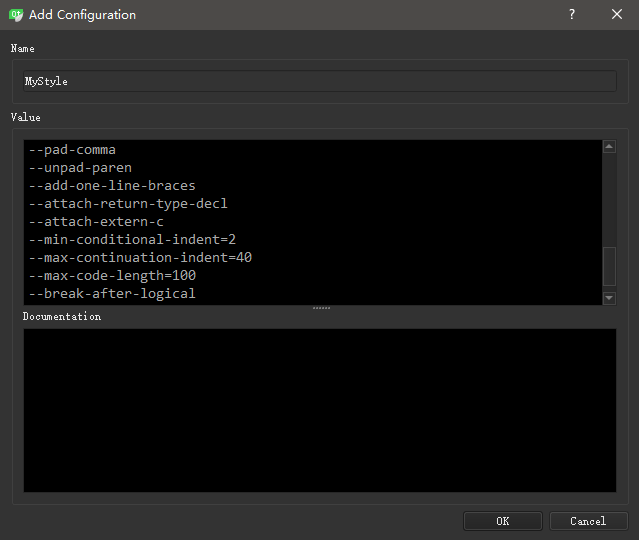
Enter any name you like, and paste the following parameters into the Value field.
Tip: The following is for reference only. If you wish to modify it, please consult the Artistic Style documentation online.
--recursive
--style=allman
--convert-tabs
--indent=spaces=4
--attach-closing-while
--indent-switches
--indent-namespaces
--indent-continuation=4
--indent-preproc-block
--indent-preproc-define
--indent-preproc-cond
--indent-col1-comments
--pad-oper
--pad-header
--unpad-paren
--delete-empty-lines
--align-pointer=name
--align-reference=name
--add-braces
--pad-comma
--unpad-paren
--add-one-line-braces
--attach-return-type-decl
--attach-extern-c
--min-conditional-indent=2
--max-continuation-indent=40
--max-code-length=100
--break-after-logical
Click OK to finish adding the custom style, then click Apply to save the settings and close the dialog.
Conclusion
This concludes the configuration of the code formatting plugin. For configuration or usage instructions for other plugins, please refer to the blog post Qt Beautifier: Organize Your Code.
During use, your code will be automatically formatted upon saving.