Preface
Driven by current R&D requirements, I looked up the relevant material and verified the feasibility of the build procedure hands-on, and recorded the technical implementation in this tutorial. Its purpose is to build the map engine libraries for development under Windows x64, and it targets the QT + VisualStudio integrated development environment.
I. Required Resources
-
Source packages and versions
OpenSceneGraph-3.6.5.zip, osgearth-osgearth-3.4.zip, osgQt.zip
-
Test data file
OpenSceneGraph-Data-3.4.0.zip
-
OpenGL dependencies
EGL-Registry-main.zip, OpenGL-Registry-main.zip, 3rdParty_VS2017_v141_x64_V11_full.7z
-
Third-party dependencies of OsgEarth (source)
lerc-19542a0.zip, imgui-9e8e5ac.zip, rapidjson-f54b0e4.zip, sqlite-amalgamation-3390200.zip, sqlite-dll-win-x64-3390200.zip, glew-2.1.0-win32.zip
-
Build environment software
-
Cmake 3.18.3, VisualStudio 2017 (hereafter VS2017), Qt Creator 5.12.2 (hereafter Qt)
II. Building Osg
1) Preparing the Build Environment
Install the build environment — Cmake, VS2017, Qt and so on. The details are not repeated here; there are plenty of tutorials online and the default installation is fine.
2) Creating the Source Build Workspace
Create a folder named Osg anywhere on disk, as shown below (being lazy, I created it straight on the desktop)

-
_osgBuild: stores the VS project files generated by Cmake
-
__3rdParty_x64:__stores the third-party dependencies (extract 3rdParty_VS2017_v141_x64_V11_full.7z into this folder)
-
__OpenSceneGraph_3.6.5:__holds the Osg 3.6.5 source (extract 3rdParty_VS2017_v141_x64_V11_full.7z into this folder)
-
__OpenSceneGraph-Data:__optional; it exists so that after the build the data inside can be used to verify whether the libraries were built successfully (extract OpenSceneGraph-Data-3.4.0.zip into this folder)
3) Generating the Osg Solution
Open the Cmake-Gui main window and set the source path and the build output path, as shown below
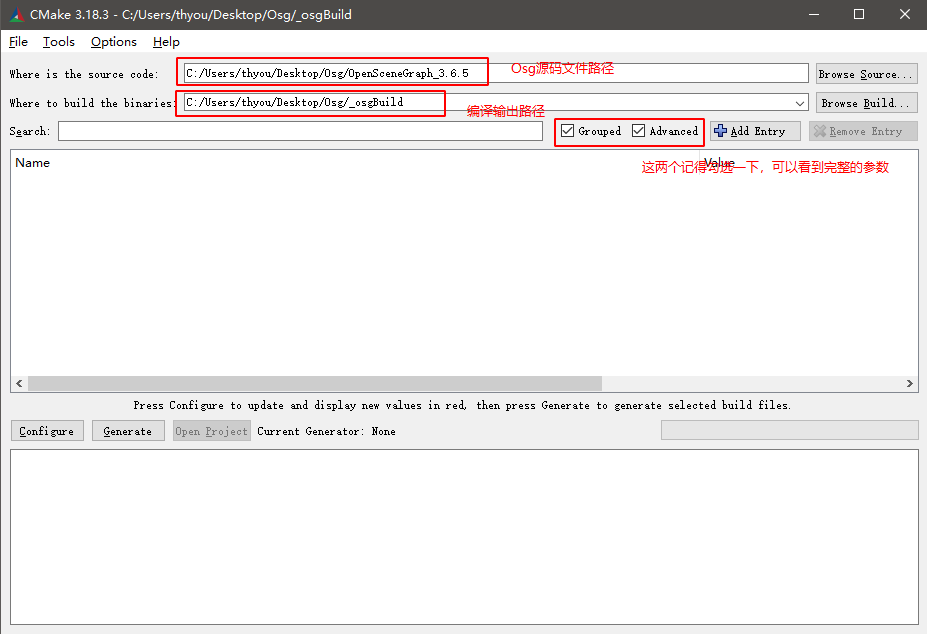
Click the “Configure” button and set the build parameters, as shown below
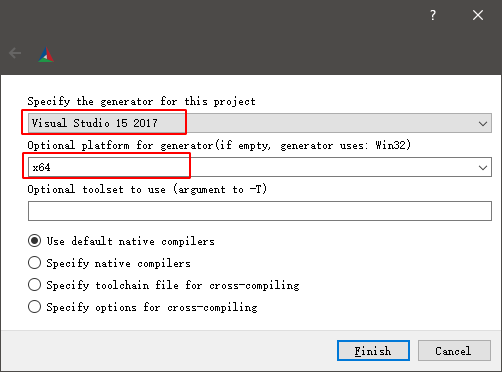
Click the “Finish” button to start configuring the source; once the progress bar completes, “a wall of red” appears, as shown below
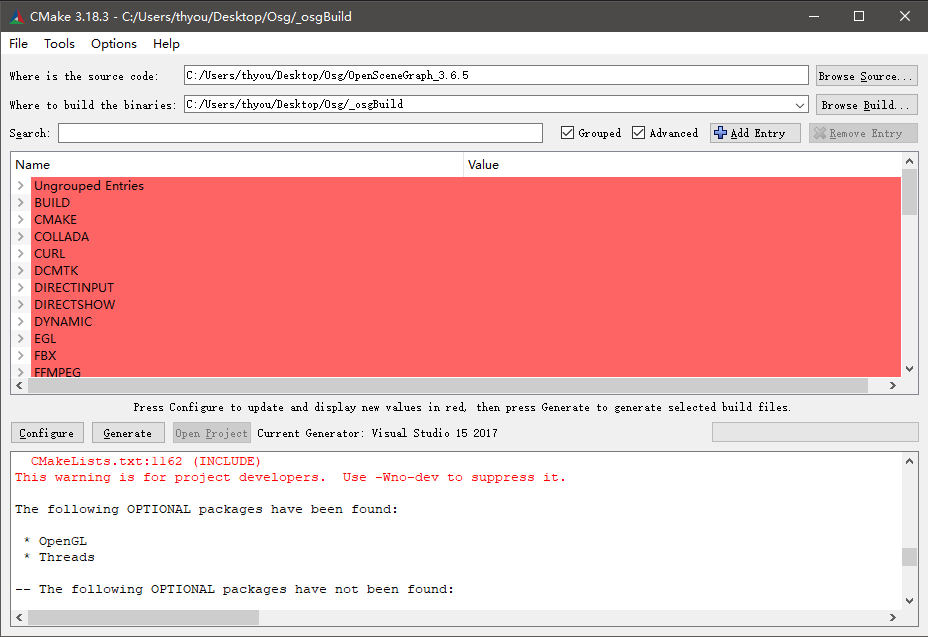
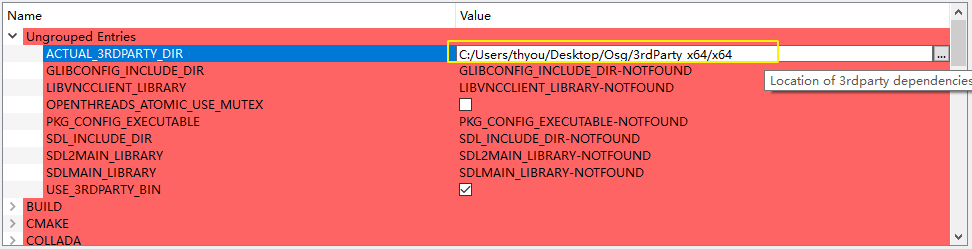
Expand Ungrouped Entries and, in the first item ACTUAL_3RDPARTY_DIR, select the path of the x64 folder inside 3rdParty_VS2017_v141_x64_V11_full,
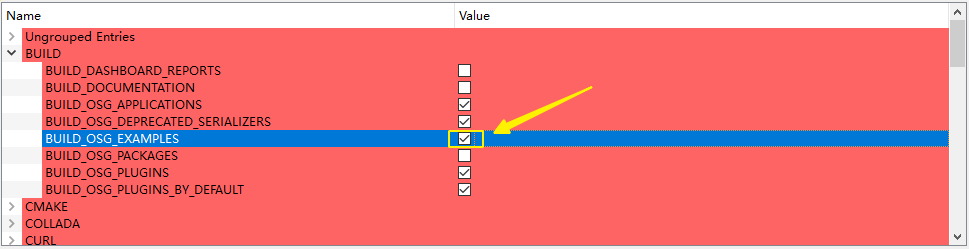
Expand BUILD and check BUILD_OSG_EXAMPLES,
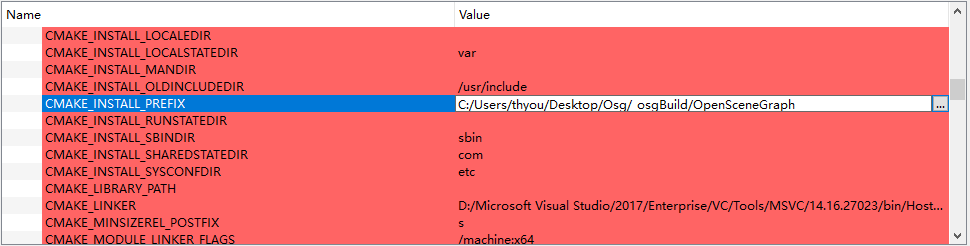
Expand CMAKE and change the path of CMAKE_INSTALL_PREFIX to the OpenSceneGraph folder inside “_osgBuild” (it does not matter that the folder is not there yet; INSTALL creates it automatically),
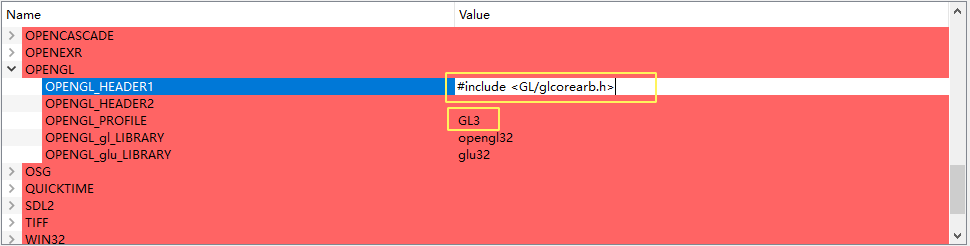
Expand OPENGL, change OPENGL_HEADER1 to #include <GL/glcorearb.h> and change OPENGL_PROFILE to GL3
[!NOTE]
Note: OSGEarth 3.3 requires OSG to support GL3, so additional GL API files are needed
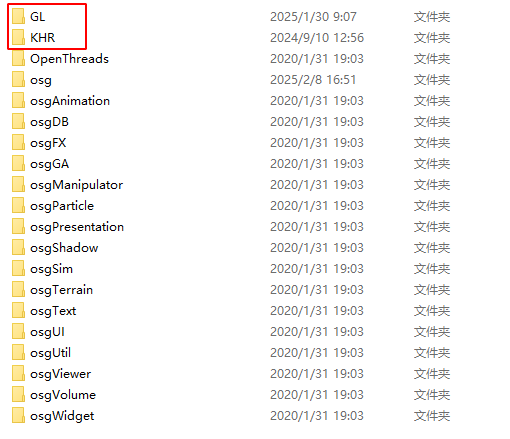
Extract EGL-Registry-main.zip and OpenGL-Registry-main.zip separately and open their api folders. Copy the KHR folder from EGL-Registry-main\api into the include folder of the Osg source (Osg\OpenSceneGraph_3.6.5\include); likewise, copy the GL folder from OpenGL-Registry-main\api into the include folder of the Osg source (Osg\OpenSceneGraph_3.6.5\include), as shown below
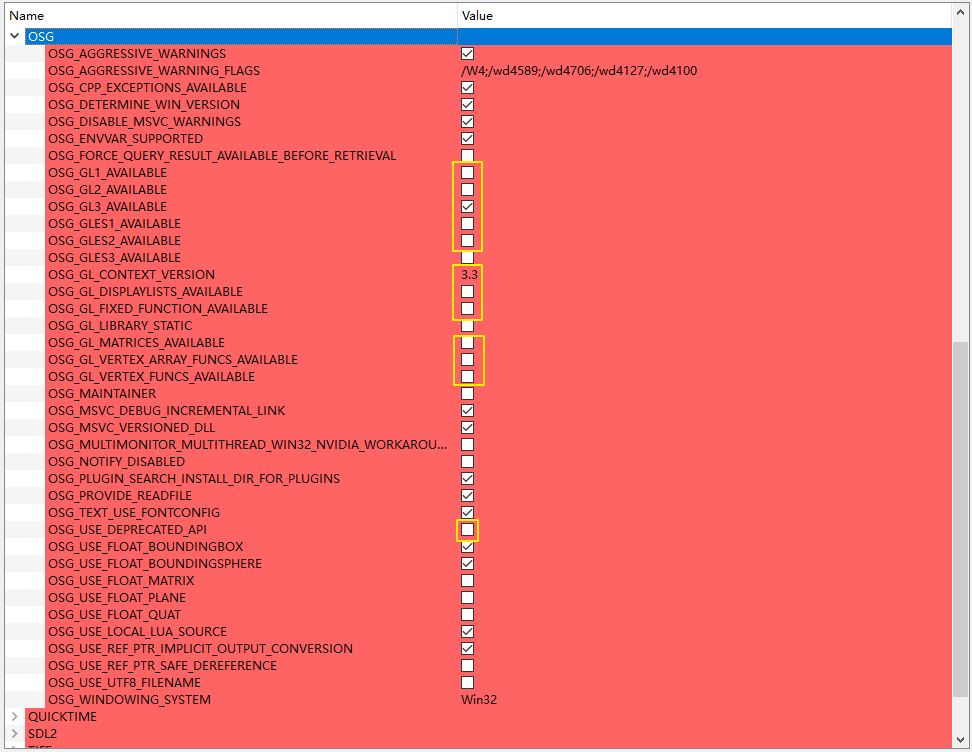
Expand OSG and change OSG_GL_CONTEXT_VERSION to 3.3,
Check
OSG_GL3_AVAILABLE
Uncheck
OSG_GL1_AVAILABLE
OSG_GL2_AVAILABLE
OSG_GLES1_AVAILABLE
OSG_GLES2_AVAILABLE
OSG_GL_DISPLAYLISTS_AVAILABLE
OSG_GL_FIXED_FUNCTION_AVAILABLE
OSG_GL_MATRICES_AVAILABLE
OSG_GL_VERTEX_ARRAY_FUNCS_AVAILABLE
OSG_GL_VERTEX_FUNCS_AVAILABLE
OSG_USE_DEFRECATED_API
The result of these changes is shown below,
[!NOTE]
Tip: a small trick to speed up VS 2017 builds
Expand WIN32 and check WIN32_USE_MP to improve build speed

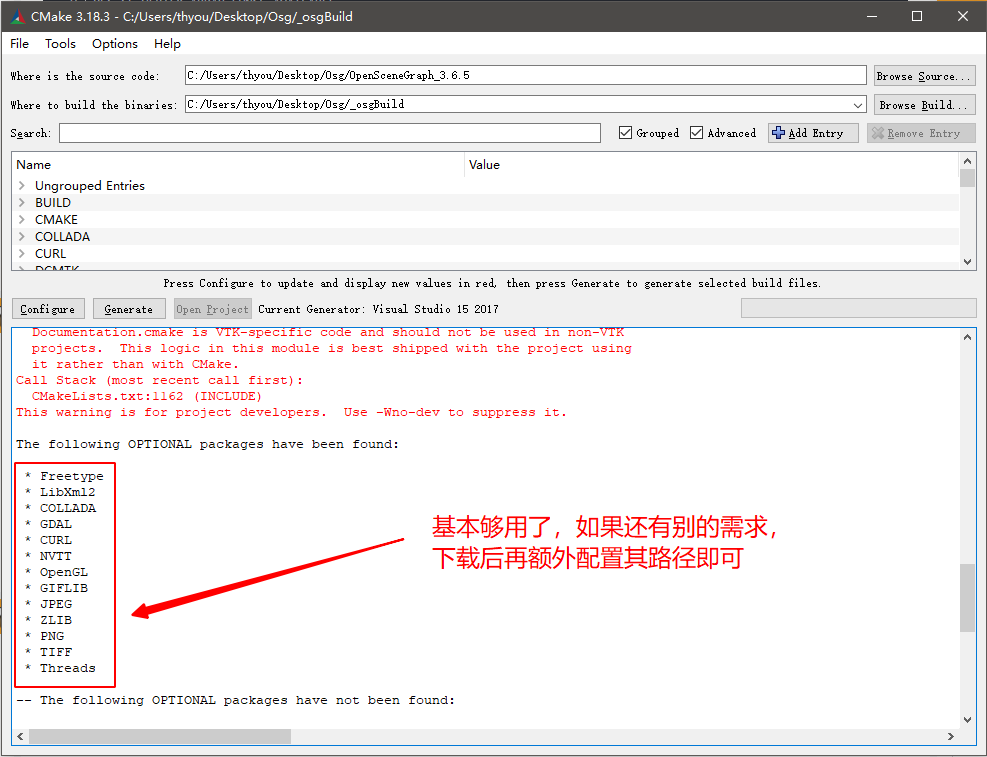
Then keep clicking the “Configure” button until no red entries remain. The log below shows that some libraries have already been found (unless there are other requirements, the libraries in the dependency package from the official site should be enough and no extra downloads are needed
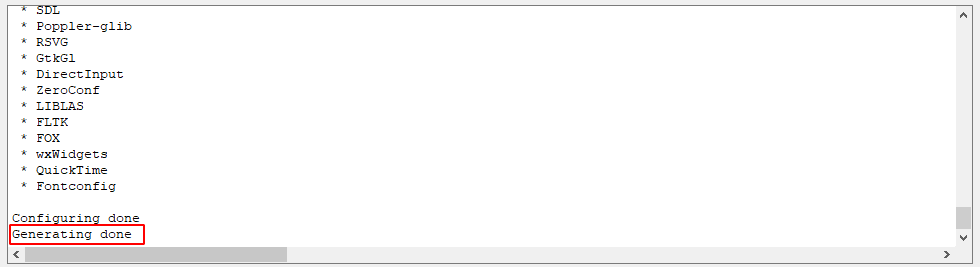
Click the “Generate” button and wait for the progress bar; when the log below shows Generating done, project generation is finished,
4) Building Osg with VS 2017
In the Cmake-Gui main window, click the “Open Project” button to bring up the VS2017 project window directly, or go to the Osg\_osgBuild path and open the OpenSceneGraph.sln solution file directly,
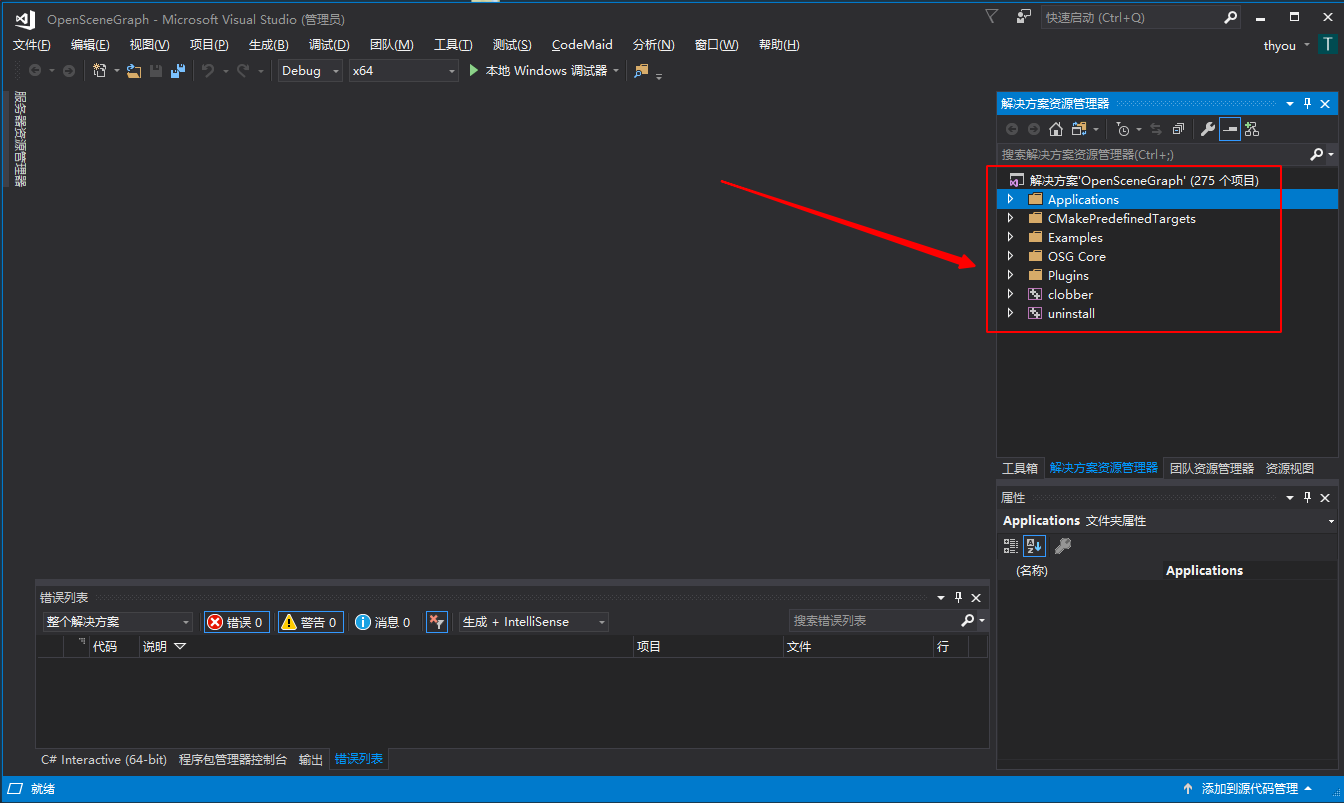
In Solution Explorer, open the osg project inside the OSG Core folder and find the Texture file under Header Files,
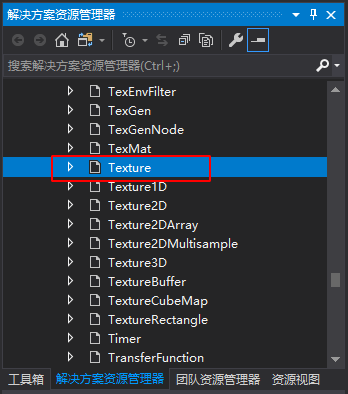
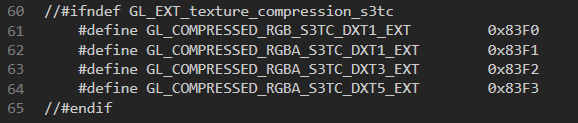
Double-click Texture to open it and comment out lines 60 and 69. The reason is that the macro GL_EXT_texture_compression_s3tc is already defined in glcorearb.h; without commenting them out, a redefinition error normally occurs,
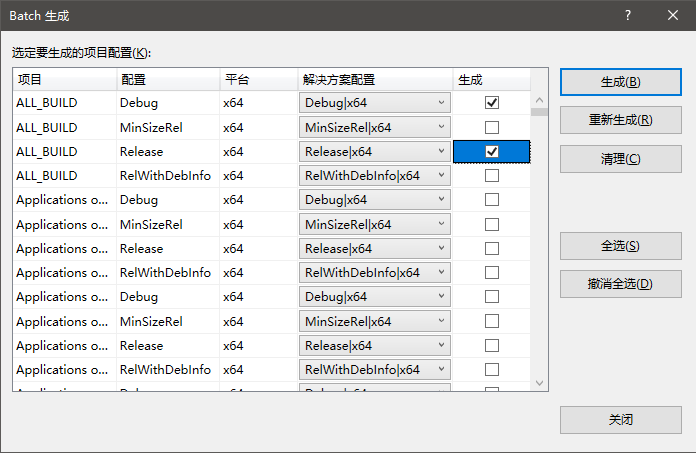
Click “Build” in the menu bar and choose “Batch Build…” from the drop-down to open the Batch Build window, then check the Debug and Release entries of ALL_BUILD, as shown below,
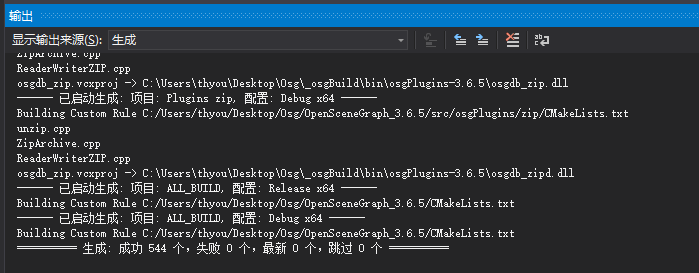
Click the “Build” button and settle in for a long compile. A few warnings may appear during the build, such as “Unicode-style formatting issues”; these mostly come from the MSVC compiler and are harmless as long as they are not errors. After roughly an hour of waiting (machines differ in performance, so it may take longer), the output pane below reports Build: *** succeeded, 0 failed, 0 up-to-date, 0 skipped, which means the first build has passed, as shown below,
Open Batch Build again, uncheck both entries of ALL_BUILD, find INSTALL and check its Debug and Release, then click the “Build” button and wait for it to finish.
After that, open the Osg\_osgBuild\OpenSceneGraph directory, which holds the generated library files.
[!NOTE]
Note: the include directory here does not carry the GL and KHR folders from earlier — remember to copy them over manually.

Create a folder named OsgEarth3.4_VS2017 on the desktop, copy the built osg libraries into it, then copy over the earlier 3rdParty folder as well, ready for building OsgEarth later, as shown below

5) Verifying the Osg Build
Before verifying, environment variables have to be set for the bin folders of both Osg and 3rdParty,
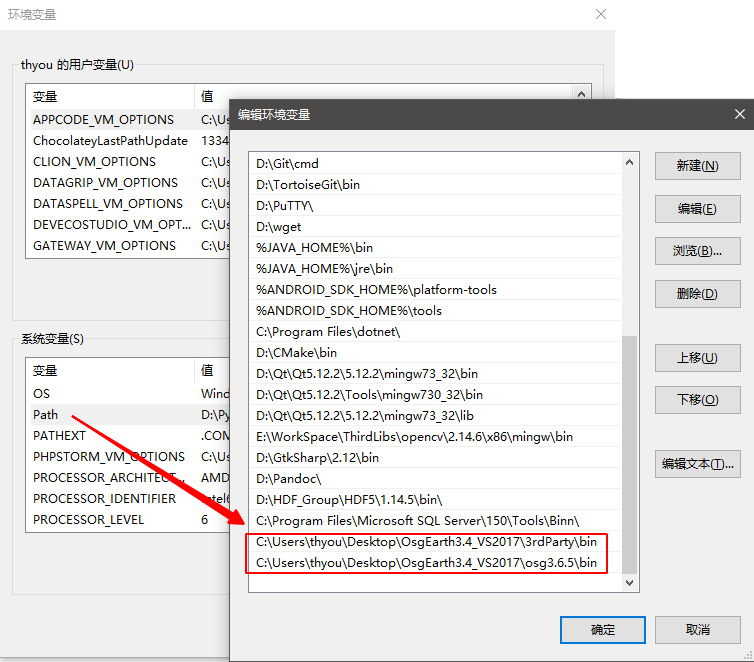
Once that is done, remember to reboot the machine or it will not take effect, then create a new OsgTest console project
Paste the code into the Main function and include the headers, as shown below
#include <iostream>
#include <osg/Node>
#include <osgDB/ReadFile>
#include <osgViewer/Viewer>

int main()
{
    /* remember to change the cow.osg file path to your own */
	osg::Node * node = osgDB::readNodeFile("C:\\Users\\thyou\\Desktop\\Osg\\OpenSceneGraph-Data\\cow.osg");
	osgViewer::Viewer viewer;
	viewer.setSceneData(node);
	viewer.realize();
	viewer.run();
	return 0;
}
Right-click Properties on the project and configure the header include directories, as shown below
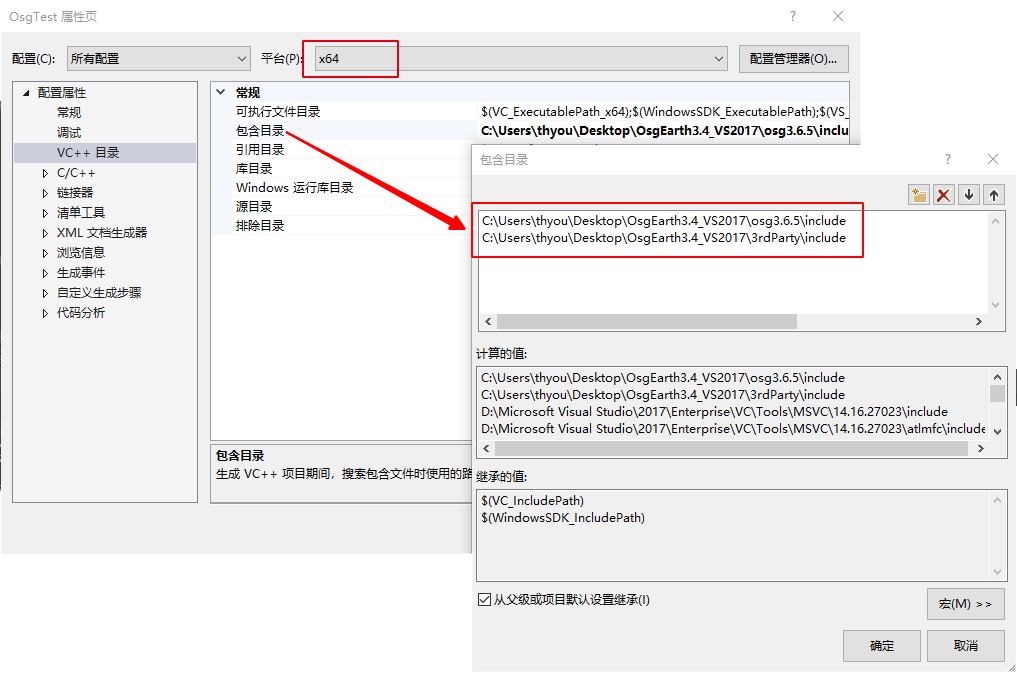
Configure the referenced libraries, as shown below
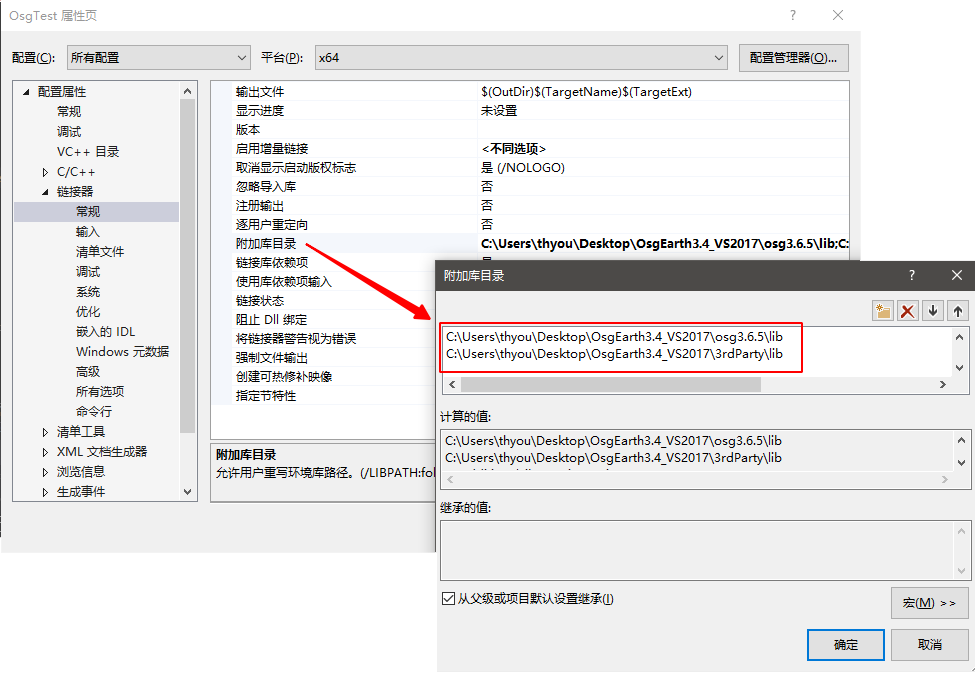
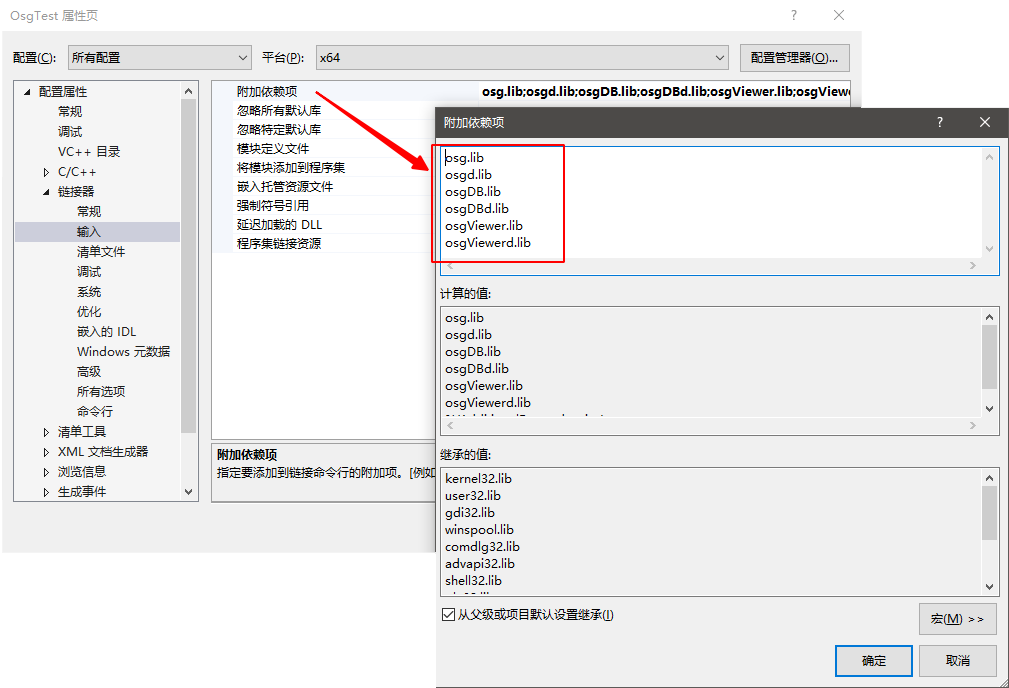
Add the names of the libs that are used, otherwise they will be reported as not found
[!NOTE]
Note: library files named xxxd.lib in the lib folder are the debug versions of the libraries — for example osgd.lib is the debug version of osg.lib
Click “Local Windows Debugger” to start running,

The result is shown below

[!NOTE]
Explanation: because GL3 is enabled, some rendering is incompatible, so glider.osg and cow.osg look somewhat different from usual
II. Building OsgEarth
1) Creating the Source Build Workspace
Create a folder named OsgEarth anywhere on disk, as shown below (being lazy, I again created it straight on the desktop)

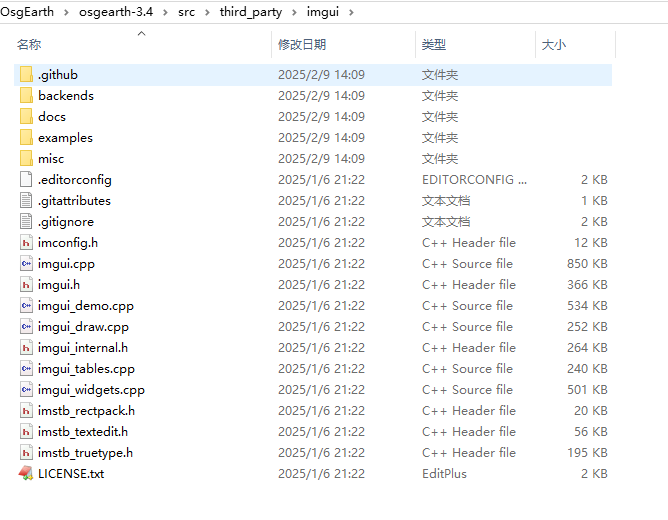
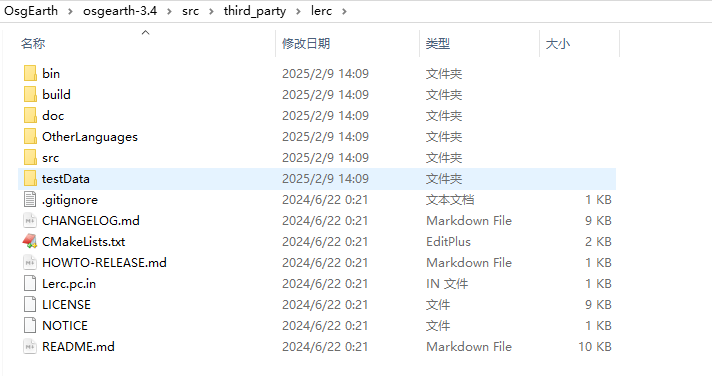
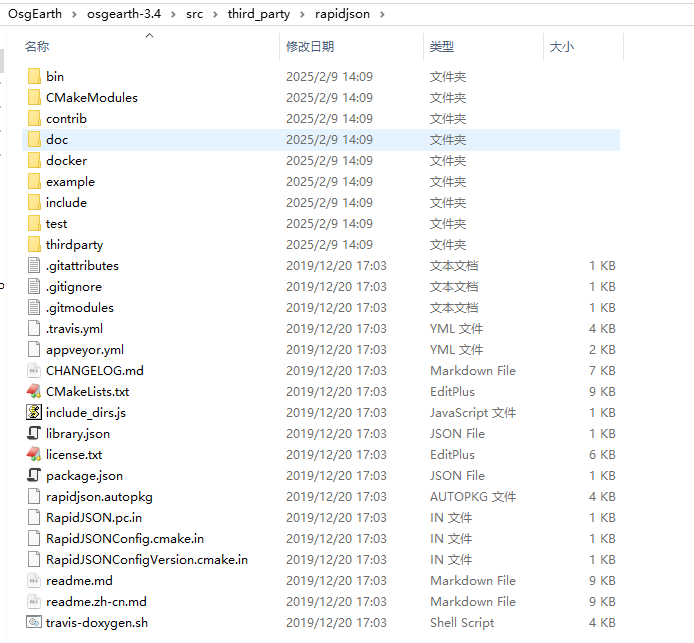
Under OsgEarth\osgearth-3.4\src\third_party, the three libraries imgui, lerc and rapidjson are third-party and have to be extracted and copied into the corresponding directories manually,
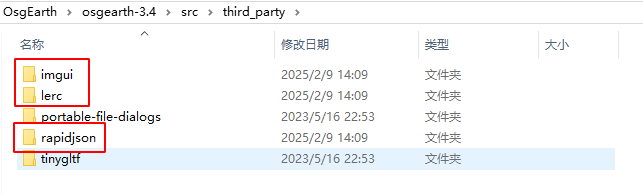
The corresponding files are imgui-9e8e5ac.zip, lerc-19542a0.zip and rapidjson-f54b0e4.zip, as shown below
2) Preparing the sqlite3 and glew Libraries
Building the sqlite3 library
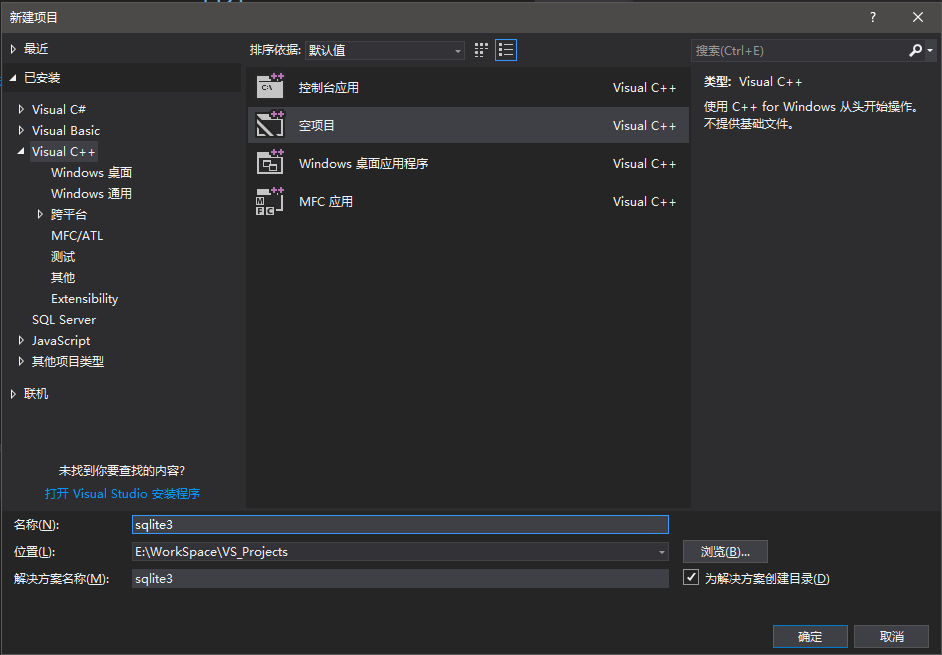
Open VS2017 and create a new empty project named sqlite3,
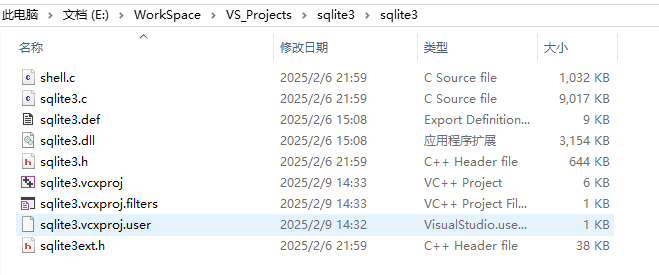
Extract both sqlite-amalgamation-3390200.zip and sqlite-dll-win-x64-3390200.zip into the solution’s project directory, as shown below
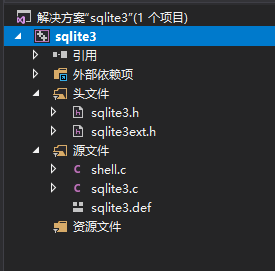
Right-click the sqlite3 project and choose Add → Existing Item,
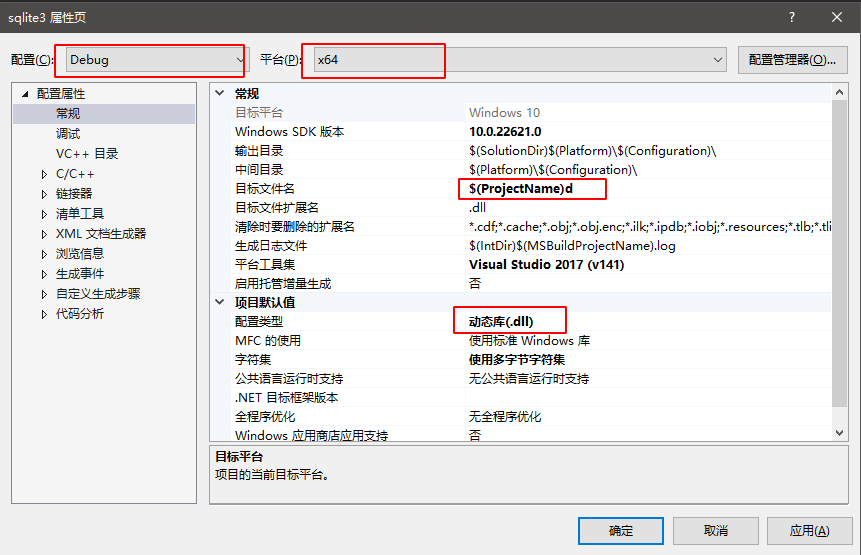
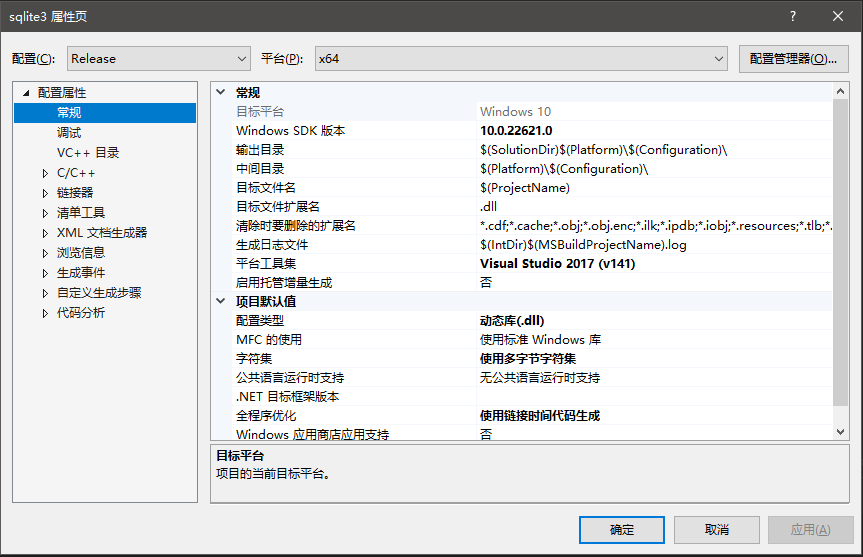
Right-click the project and choose Properties to open the project configuration window. Under General, set Configuration Type to Dynamic Library (.dll) and append a d to the Target Name (this is only needed in Debug mode, not in Release),
[!NOTE]
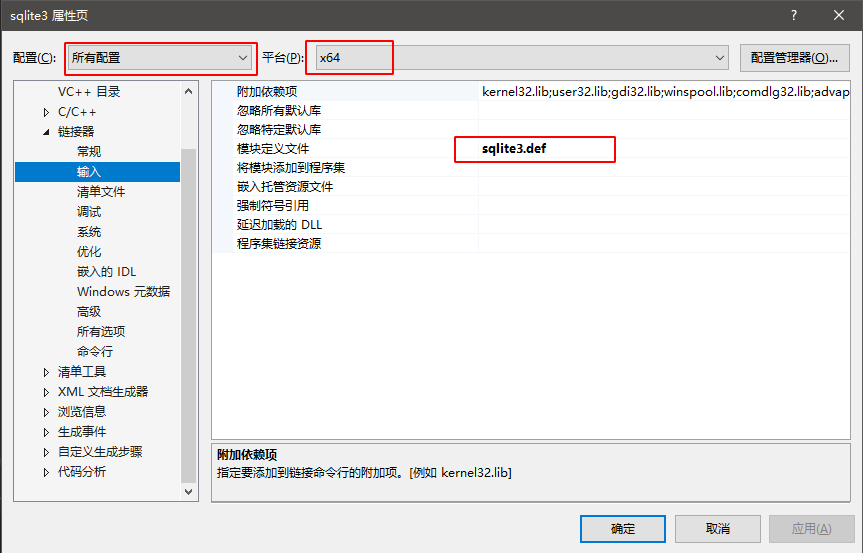
Note: the build platform is x64 — do check it. Both Debug and Release have to be configured; apart from the small difference in Target Name, all the other settings are identical, so you can drop down the configuration list and select “All Configurations” so that it only needs setting once
Under Linker → Input, set Module Definition File to sqlite3.def,
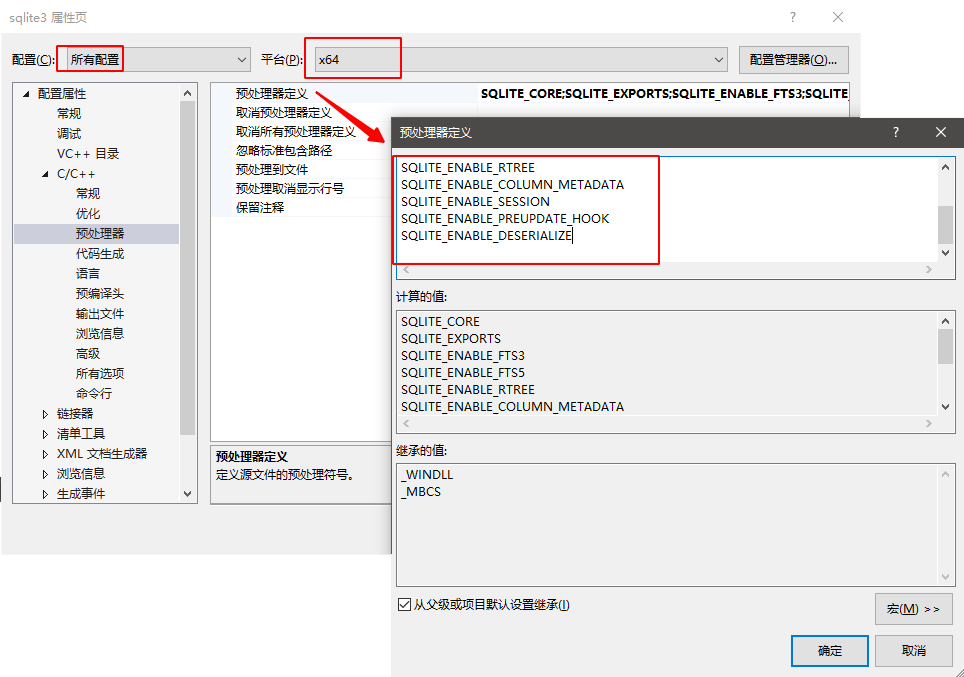
Under C/C++ → Preprocessor, add the following macros to Preprocessor Definitions:
SQLITE_CORE
SQLITE_EXPORTS
SQLITE_ENABLE_FTS3
SQLITE_ENABLE_FTS5
SQLITE_ENABLE_RTREE
SQLITE_ENABLE_COLUMN_METADATA
SQLITE_ENABLE_SESSION
SQLITE_ENABLE_PREUPDATE_HOOK
SQLITE_ENABLE_DESERIALIZE
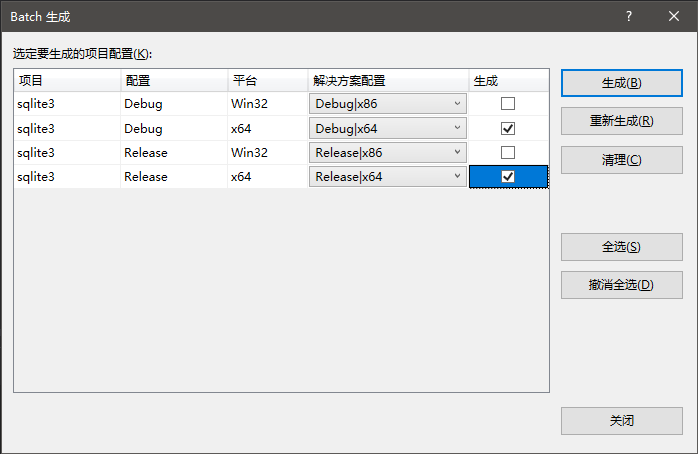
Open the Batch Build window, check Debug and Release for sqlite3 x64, and click the “Build” button,
When the build finishes, the output window reports “Build: 2 succeeded, 0 failed, 0 up-to-date, 0 skipped”, which means compilation succeeded.
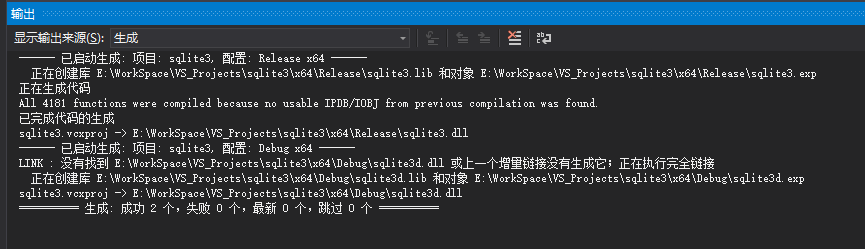
Copy the generated dll and lib files into the OsgEarth\sqlite-3.39.2 folder: sqlite3.dll and sqlite3d.dll go into the bin folder; sqlite3.lib, sqlite3d.lib and the related pdb, exp and iobj files all go into the lib folder; and all the header files go into the include folder, as shown below
[!NOTE]
Note: if a folder is missing, just create it manually

Preparing the glew library
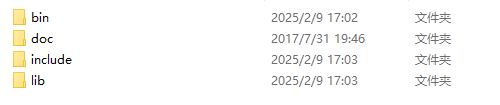
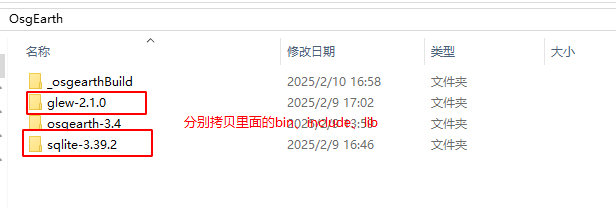
Extract glew-2.1.0-win32.zip. Again, first create three folders in OsgEarth\glew-2.1.0, namely bin, include and lib, then copy the x64 files from the corresponding directories of the extracted glew-2.1.0-win32 folder into OsgEarth\glew-2.1.0, and finally copy the doc folder over as well (optional, handy for later reference; glew32s.lib is the static library and only the dynamic library is needed here, so glew32s.lib is optional). The result of the copying is shown below,
3) Generating the OsgEarth Solution
The opening part is the same as for the Osg build: open the Cmake-Gui main window, set the source path and the build output path, and select the VS compiler, as shown below
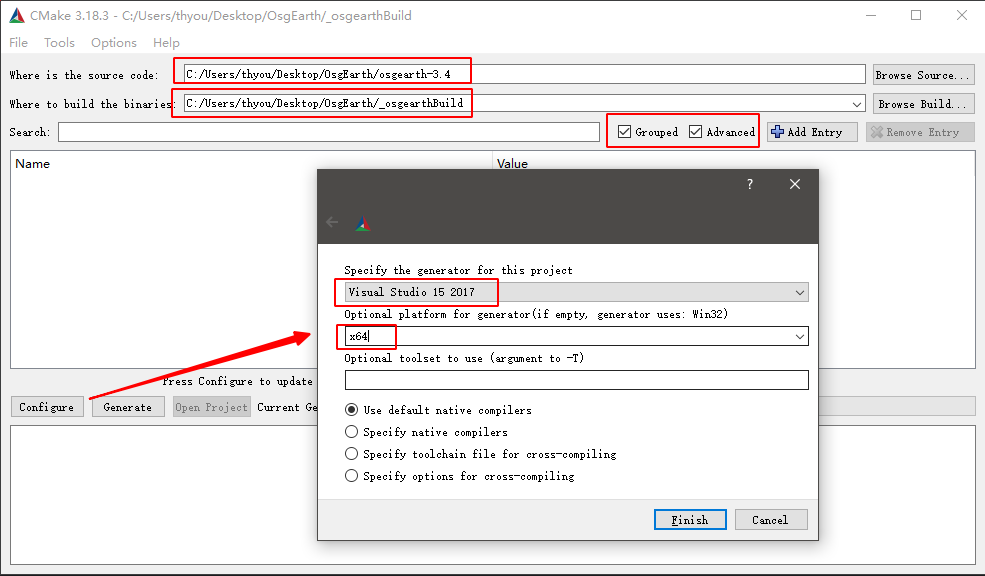
After clicking the “FInish” button, wait for the progress bar; it is a wall of red again, which is worked through step by step below,
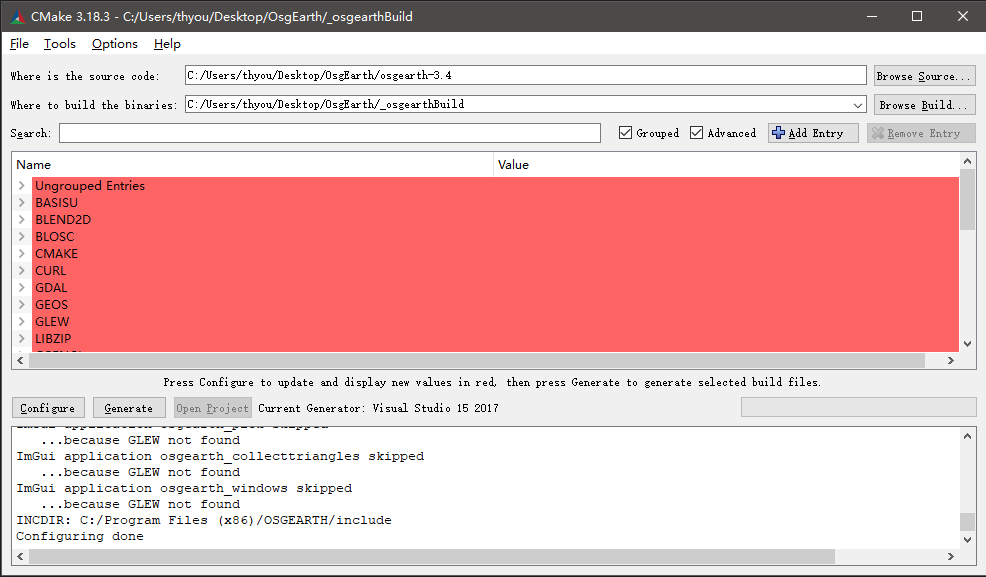
Expand CMAKE and change the path of CMAKE_INSTALL_PREFIX to the OSGEARTH folder inside the project folder that was created (it does not matter that the folder is not there yet; INSTALL creates it automatically)

Expand CURL, set INCLUDE to the include directory of the OSG 3rdParty package, where a curl folder can be seen, set DEBUG and RELEASE to libcurl_impd.lib and libcurl_imp.lib in the lib directory of the 3rdParty package, and uncheck the static-library option

Then comes the series of OSG-related dependencies below. Just expand OSG, set the first entry OSG_DIR to the path configured earlier in OSG’s CMAKE_INSTALL_PREFIX, then click the “Configure” button; once the refresh completes they should all be found

[!NOTE]
Tip: if the Osg and 3rdParty environment variables were not removed after step 5) of part two, clicking “Configure” above should turn up all the libraries
If the Error dialog pops up again, check whether it concerns GDAL, then expand it and select the relevant parameters

Expand the OSG-related entries one by one and they should all be found automatically. If errors remain, check which dependency is involved and download it as appropriate — here I only had to set GLEW and SQLITE3,
Expand GLEW, set INCLUDE to the glew include directory from earlier, SHARED_LIBRARY_DEBUG to glew32d.lib and SHARED_LIBRARY_RELEASE to glew32.lib

Expand SQLITE3, set INCLUDE to the sqlite3 include directory from earlier (I did not create a separate include folder here — the .h files sit directly in the root) and LIBRARY to sqlite3.lib

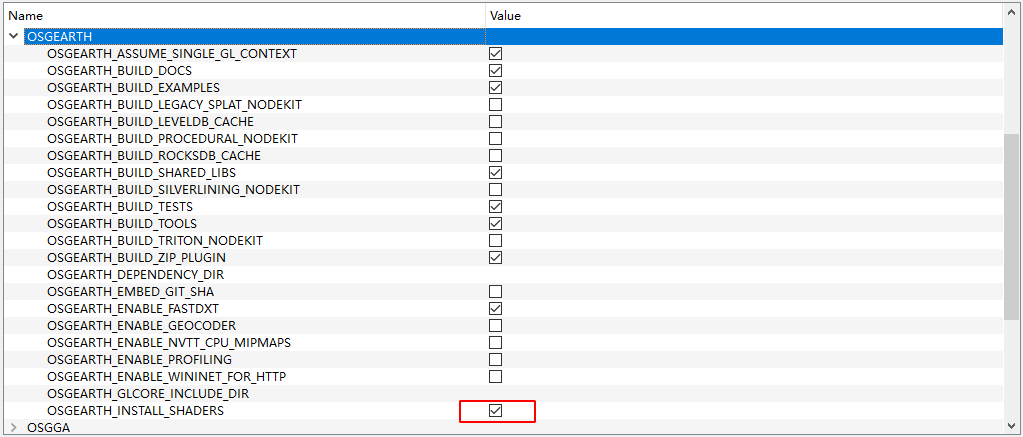
Expand OSGEARTH; there are several NodeKits here that can be checked as needed. Checking them may pull in further third-party dependencies (Triton and Silverlining, for example), which have to be downloaded separately. Here I kept the defaults and only checked OSGEARTH_INSTALL_SHADERS
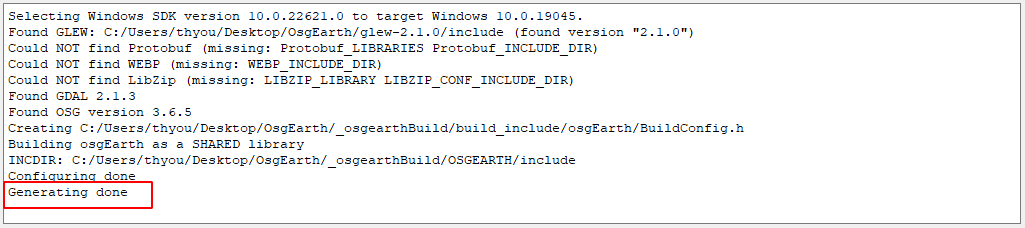
Finally click the Generate button and wait for project generation to complete
4) Building OsgEarth with VS 2017
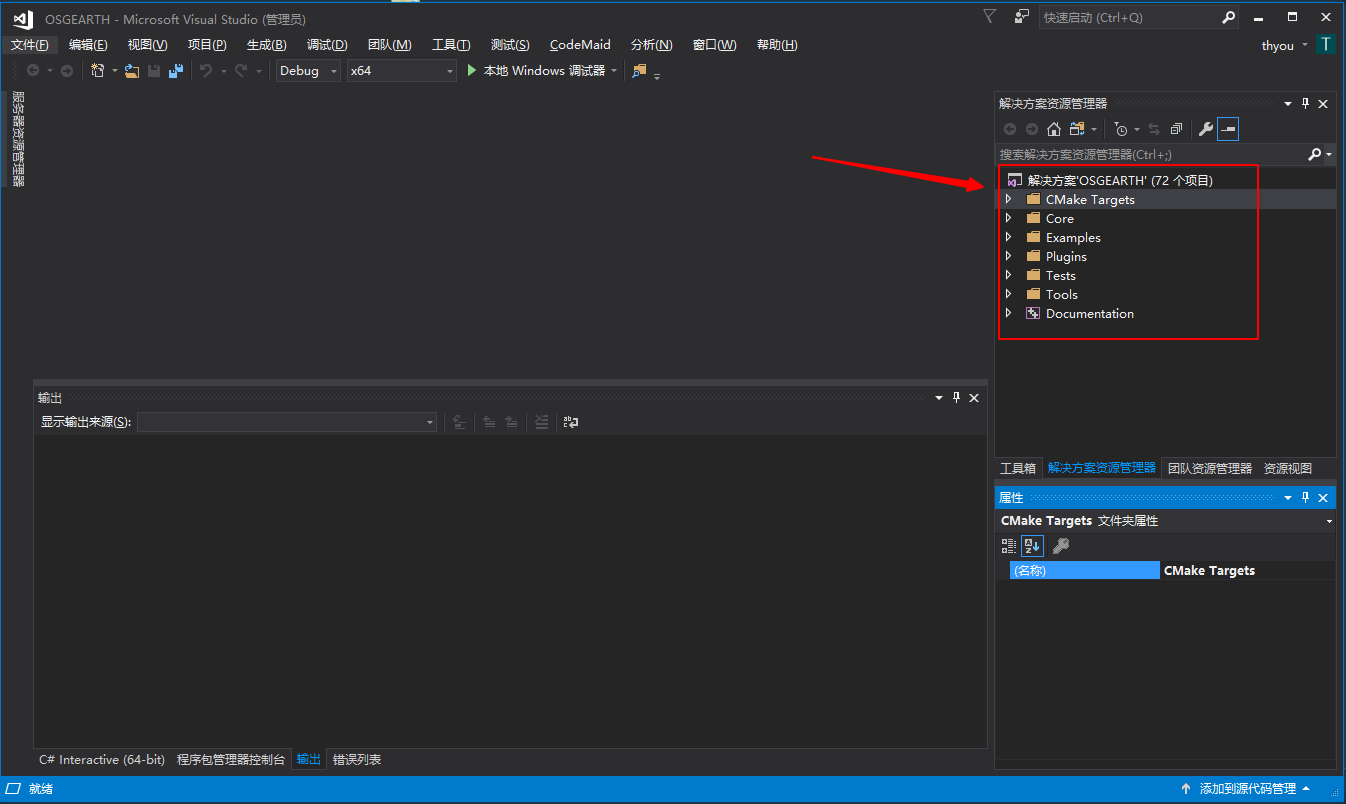
In the Cmake-Gui main window, click the “Open Project” button to bring up the VS2017 project window directly, or go to the OsgEarth\_osgearthBuild path and open the OSGEARTH.sln solution file directly,
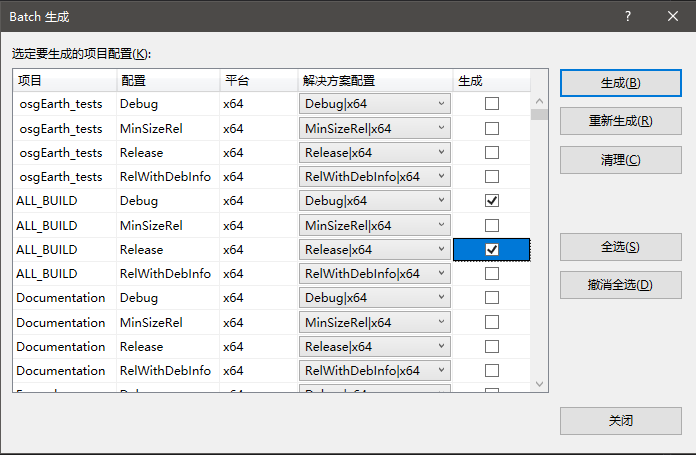
Open Batch Build and check the Debug and Release entries of ALL_BUILD,
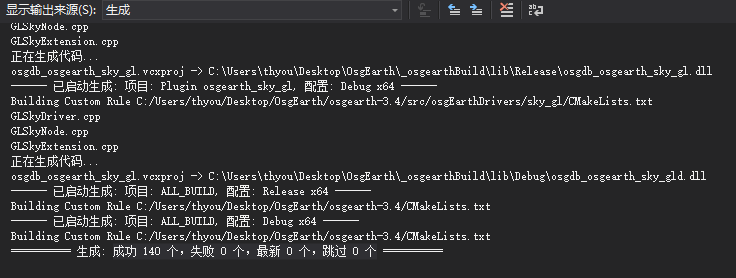
Click the “Build” button to start compiling all the sources; provided everything went smoothly earlier, there should be no errors at this point. Once everything is built, the output window reports “140 succeeded, 0 failed, 0 up-to-date, 0 skipped”,
Open Batch Build again, uncheck the Debug and Release entries of ALL_BUILD, find INSTALL and check its Debug and Release, then click the Build button and wait for it to finish.
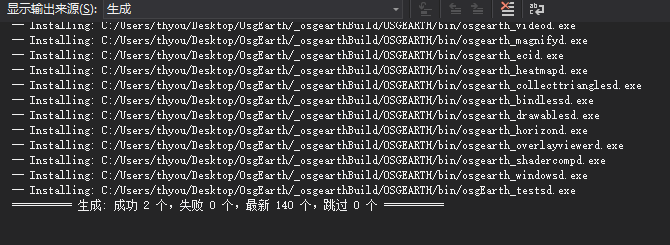
Open the directory set earlier in CMAKE_INSTALL_PREFIX (OsgEarth_osgearthBuild\OSGEARTH), which holds the generated library files.
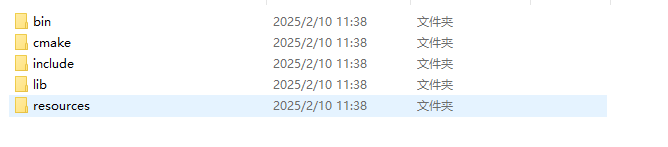
At this point the osgEarth build is complete; a little tidying up follows,
First pick a location on disk and create an osgEarth folder, then put 3rdParty, the osg libraries built earlier and the osgEarth libraries just built all into it, as shown below,
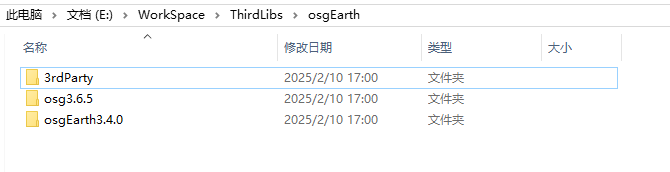
Then merge the glew and sqlite library files into 3rdParty, taking care to match them up: bin into bin, include into include and lib into lib,
5) Verifying the OsgEarth Build
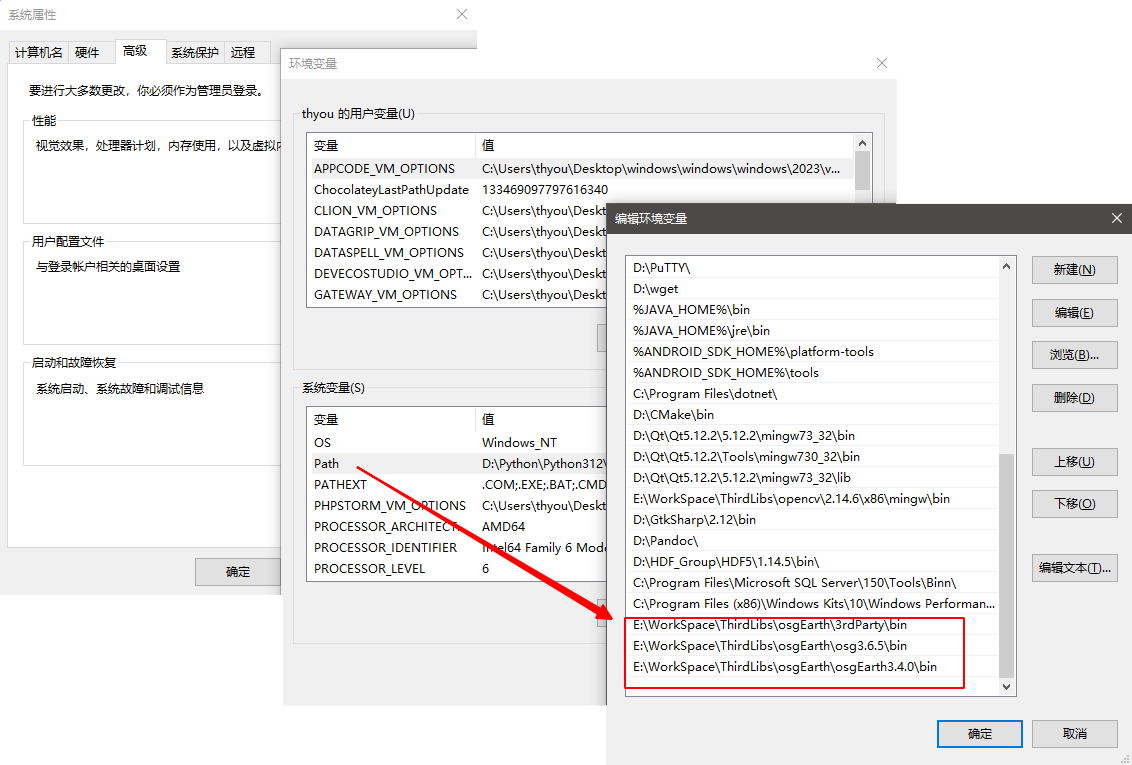
Before verifying, the environment variables have to be updated. The previous step already consolidated the built osg and osgEarth, so the original osg and 3rdParty environment variables are no longer valid. Open the system environment variables, find path under System variables, click the “Edit” button, delete the old osg and 3rdParty bin paths and replace them with the newly organized paths, as shown below
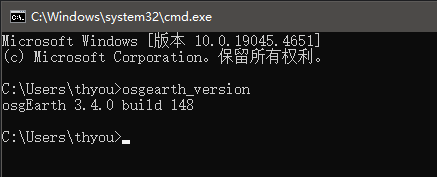
Once that is set, reboot the machine to make sure the environment variables take effect. After rebooting, open a command prompt, type “osgearth_version” and press Enter; the version information is shown,
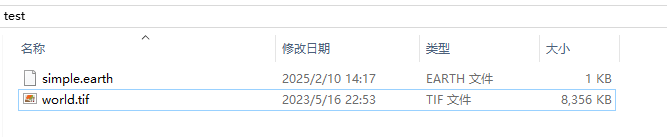
The environment variables are now in effect. Create a new test folder on the desktop, copy world.tif from the data folder of the OsgEarth source tree into it, then create a new txt file, change its extension so that it is named simple.earth, and write into it:
<map>
<GDALImage name="simple">
    <url>world.tif</url>
</GDALImage>
</map>
Open a command prompt, change into the test folder, type “osgearth_viewer simple.earth” and press Enter,
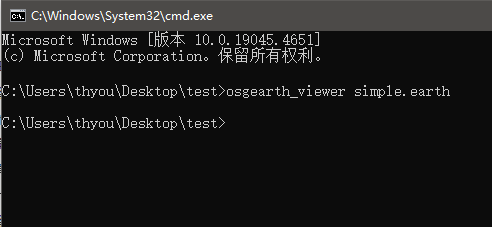
A rough globe is displayed, which means the osgearth libraries that were built are valid.
[!NOTE]
Reminder: on some machines using multiple monitors it may fail to display; leaving only one monitor connected lets this window pop up

III. Building OsgQt
1) Creating the Source Build Workspace
Create a folder named OsgQt anywhere on disk, extract OsgQt.zip into that folder and create a build folder named _osgQtBuild, as shown below

2) Generating the OsgQt Solution
The opening part is the same as for the OsgEarth build: open the Cmake-Gui main window, set the source path and the build output path, and select the VS compiler, as shown below
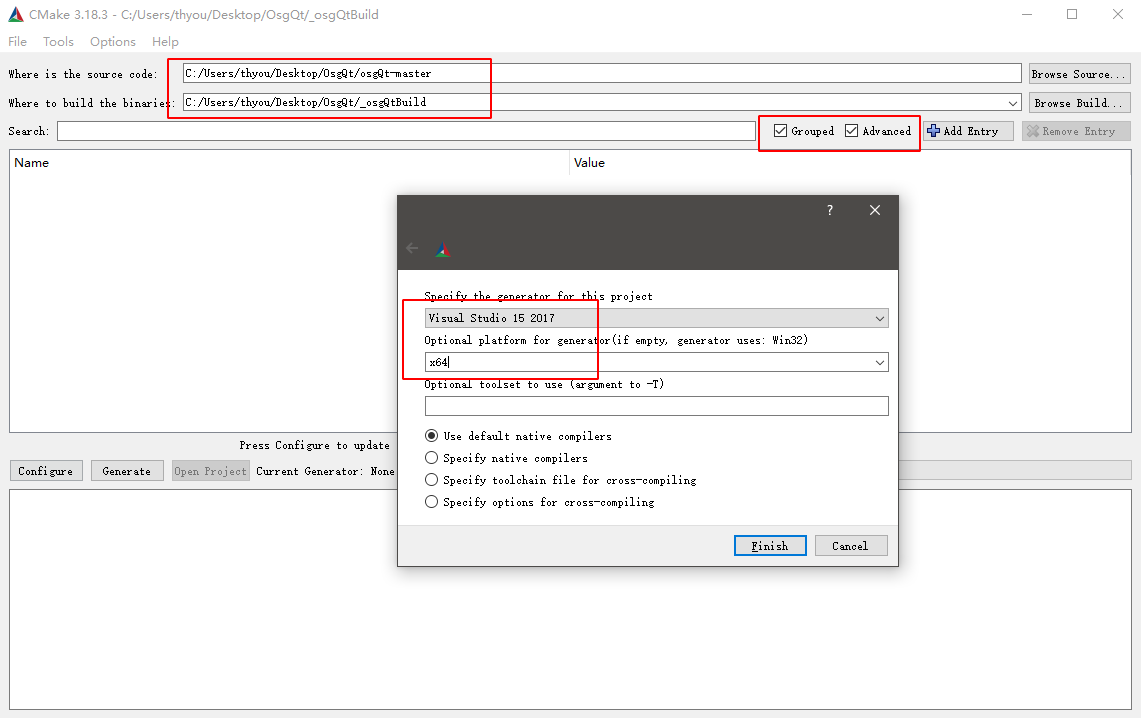
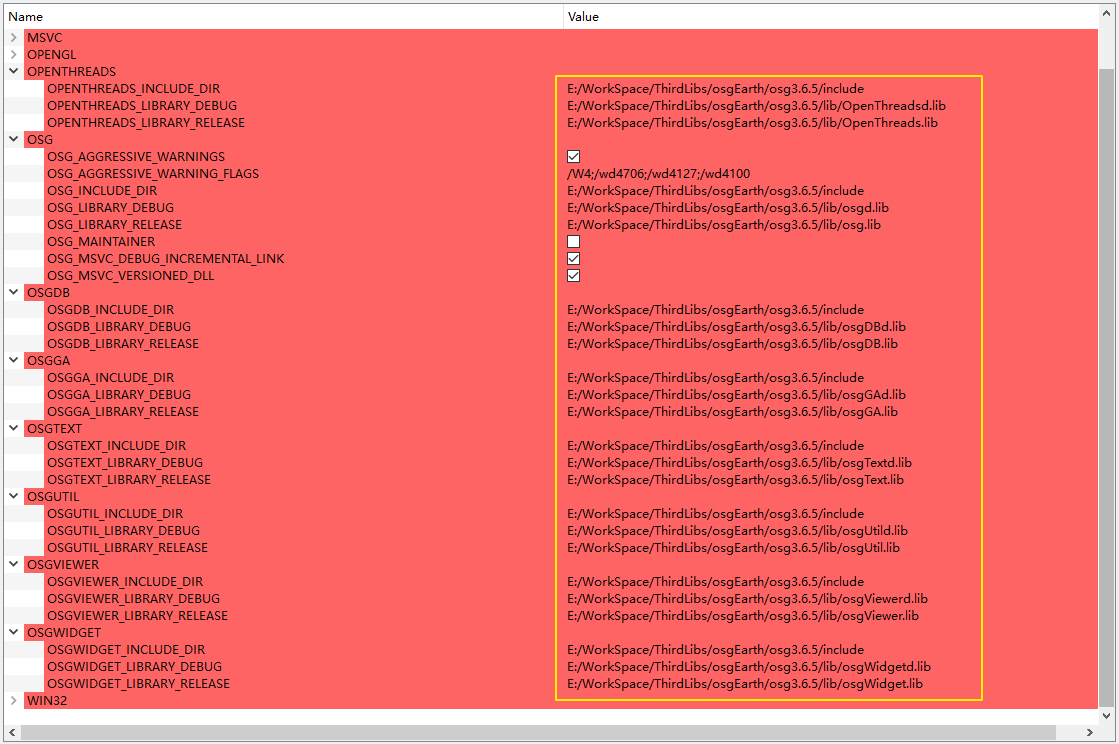
Click the “Finish” button and wait for the progress bar; it is a wall of red again. If the Osg, OsgEarth and 3rdParty environment variables were not set earlier, an Error dialog pops up and the log below shows that the OSG-related libraries cannot be found, which is rather more troublesome and has to be filled in entry by entry. If those environment variables were set earlier, it should look the same as mine here — essentially everything has already been detected and only needs checking one by one,
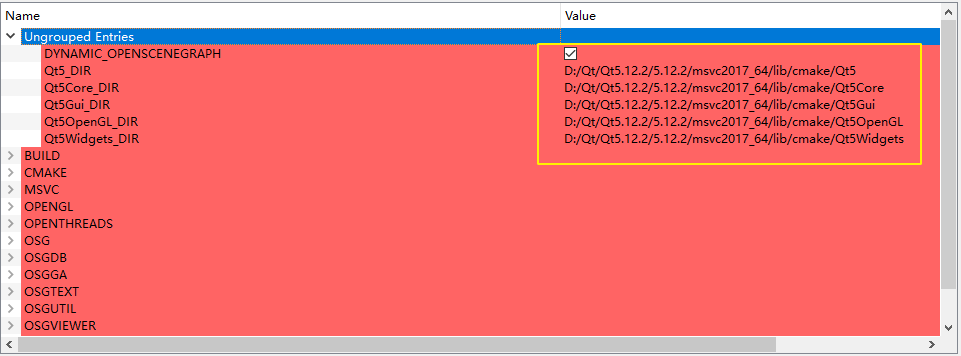
Expand Ungrouped Entries and set Qt5_DIR to:
Expand CMAKE and change the path of CMAKE_INSTALL_PREFIX to the OSGQt folder inside the project folder that was created (it does not matter that the folder is not there yet; INSTALL creates it automatically).
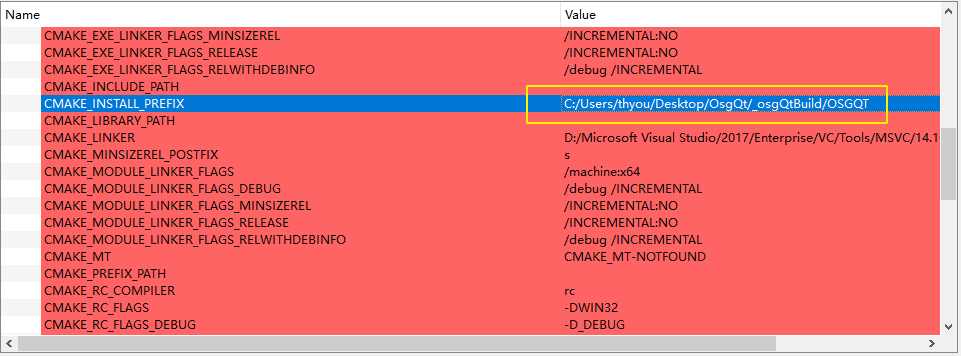
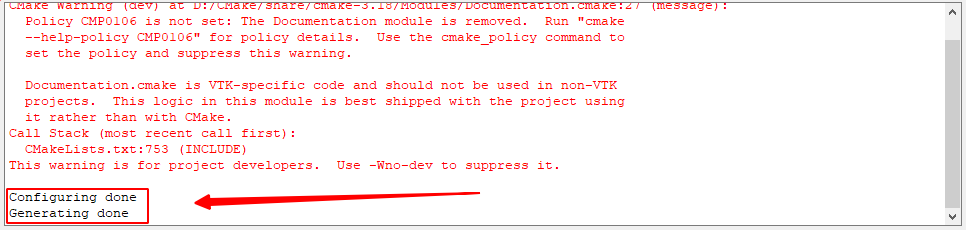
Click the “Configure” button; there should be no errors now. Some red Warning text appears in the log, which can be ignored. Then click the “Generate” button and wait for project generation to complete.
3) Building OsgQt with VS 2017
In the Cmake-Gui main window, click the “Open Project” button to bring up the VS2017 project window directly, or go to the OsgQt\_osgQtBuild path and open the osgQt.sln solution file directly,
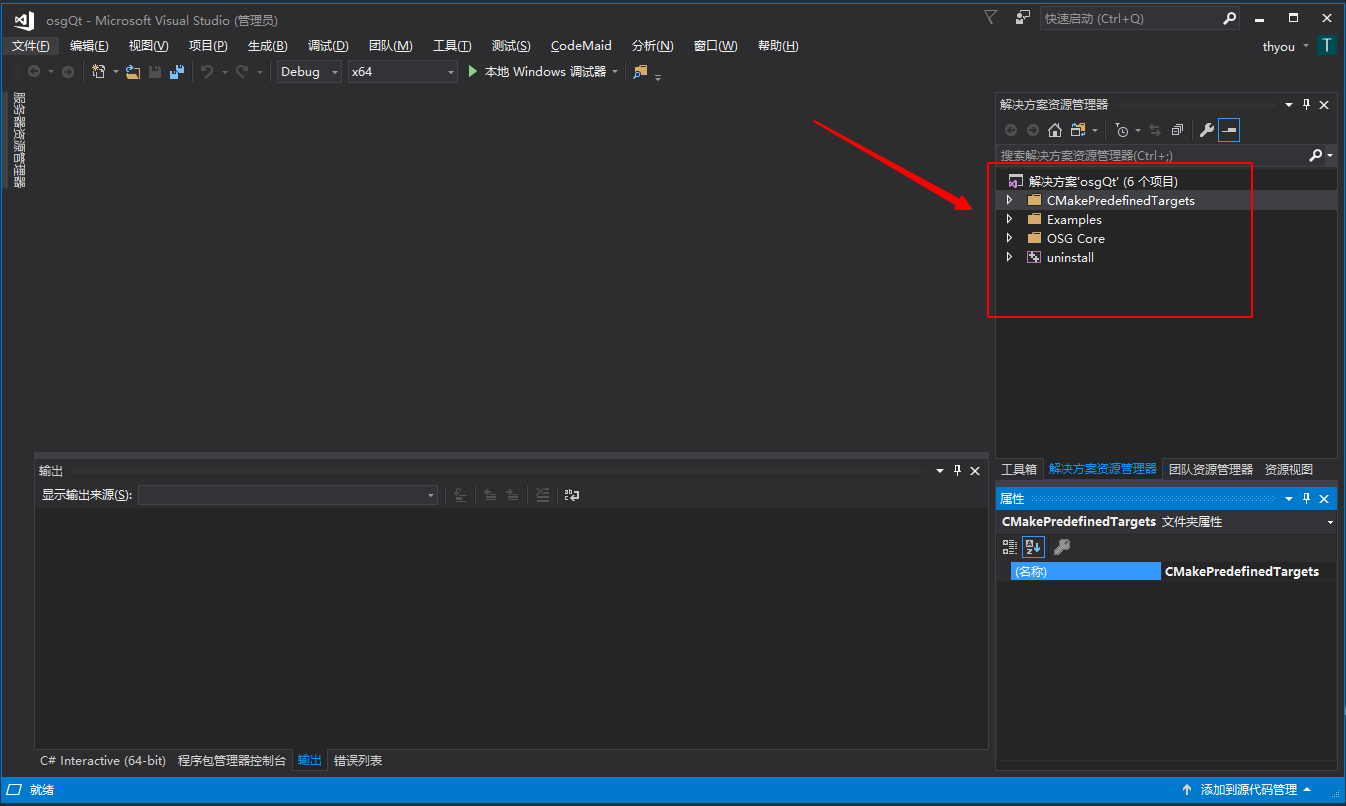
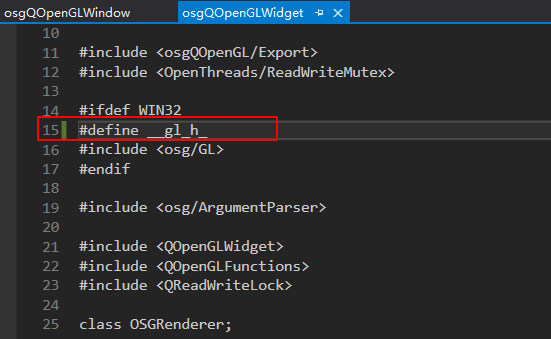
Open the project, then double-click osgQOpenGLWidget and osgQOpenGLWindow under Header Files in the OSG Core project folder and uncomment line 15, #define _gl_h, in each. By default it causes the system gl.h to be pulled in, which conflicts with the glcorearb.h downloaded earlier and produces interface redefinition problems,
Then, just as before, click Build - Batch Build, check the Debug and Release entries of ALL_BUILD in the child window that pops up, then click the Build button and wait for the build to finish; there should be no failures.
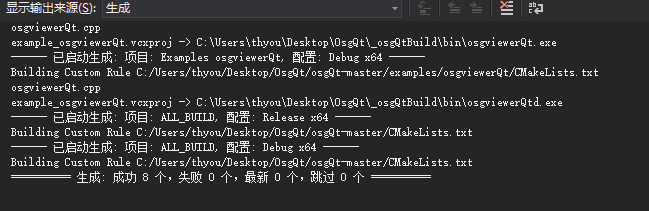
Then open the Batch Build window again, uncheck the Debug and Release entries of ALL_BUILD, check the Debug and Release entries of INSTALL, then click the Build button and wait for the build to finish.
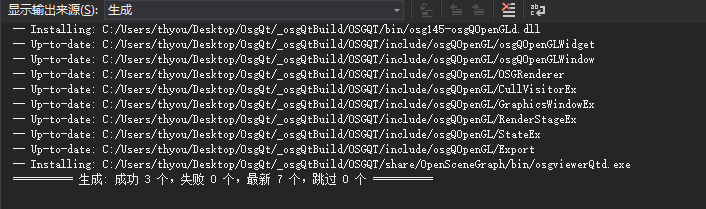
After that, open the OsgQt\_osgQtBuild\OSGQT directory, which holds the generated library files.
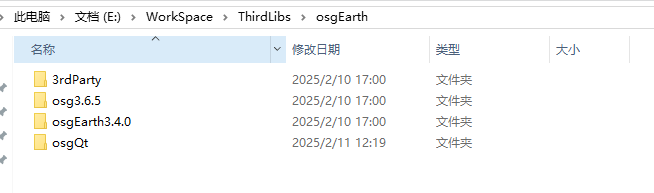
Create an osgQt folder inside the earlier osgEarth folder (the one the environment variables point at) and copy the built osgQt libraries into it, ready for testing OsgQt later.
4) Verifying the OsgQt Build
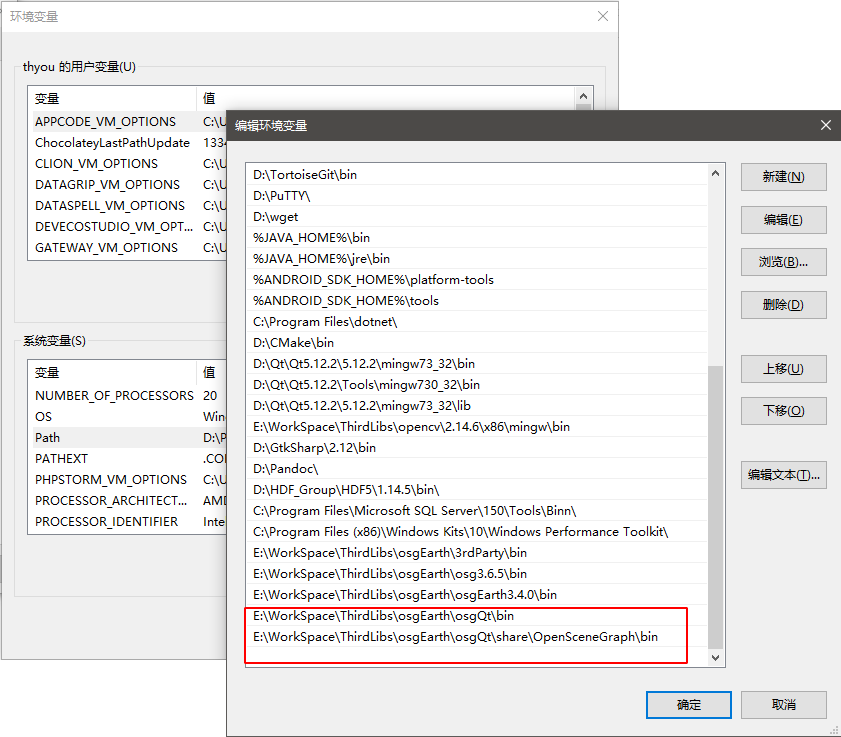
Add the environment variables: copy the bin folder of osgQt and the bin path of osgQt\share\OpenSceneGraph and add them to path in the system environment variables, as shown below
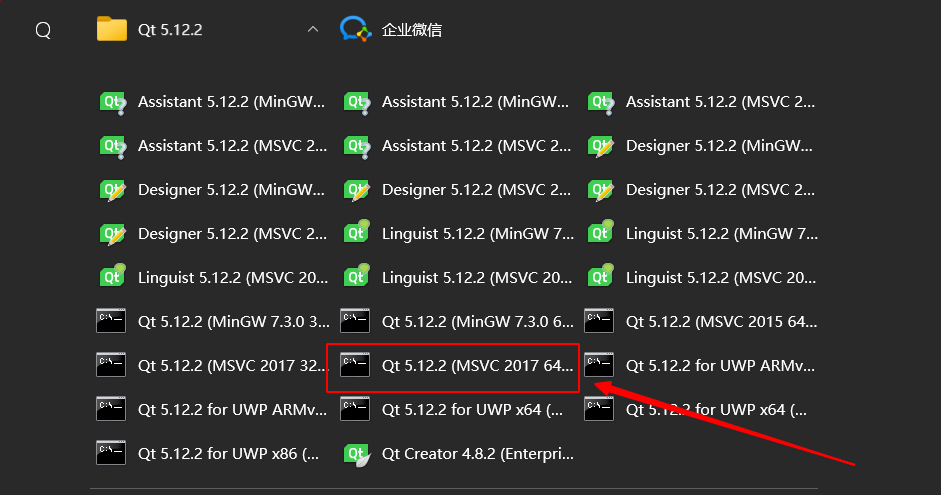
Open the Qt 5.12.2 (MSVC 2017 64-bit) command line tool on the machine, as shown below
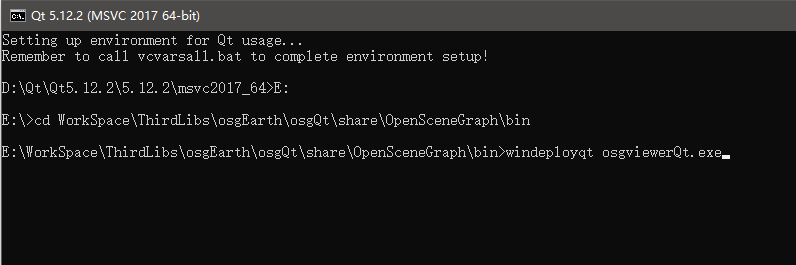
Change directory to osgQt\share\OpenSceneGraph\bin and enter the command “windeployqt osgviewerQt.exe”,
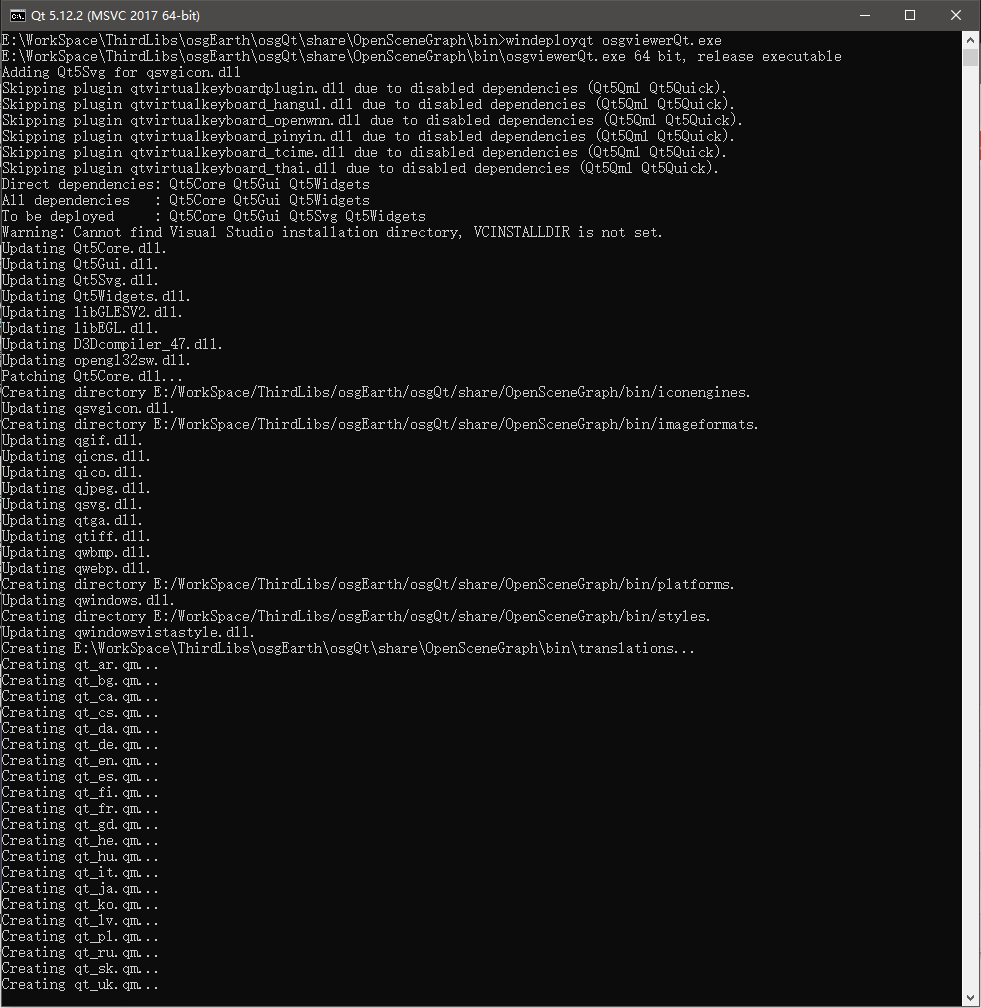
Then press Enter and it copies in the Qt libraries that osgviewerQt.exe needs.
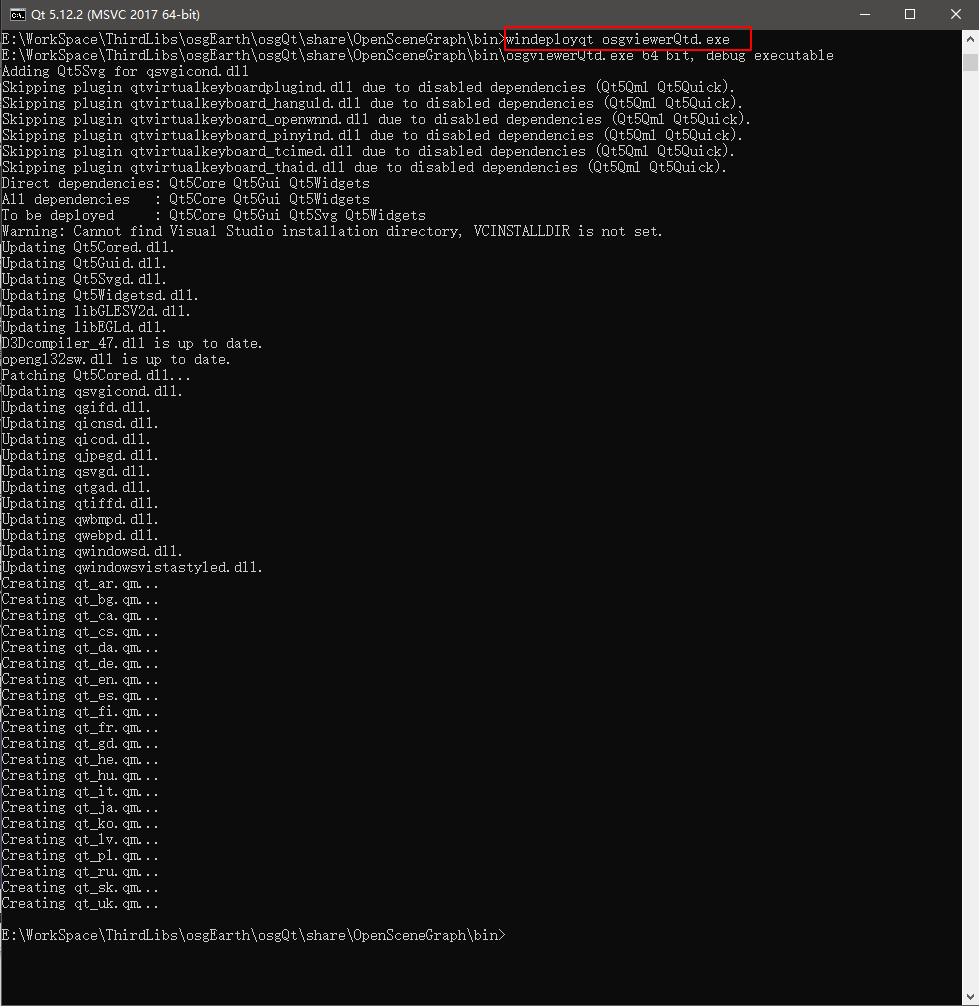
Likewise, enter the command “windeployqt osgviewerQtd.exe” and press Enter to copy in the Qt libraries that osgviewerQtd.exe needs as well,
Once that is set, reboot the machine to make sure the environment variables take effect. After rebooting, open a cmd window, use the cd command to change into the osg data directory and enter the command “osgviewerQt glider.osg”,
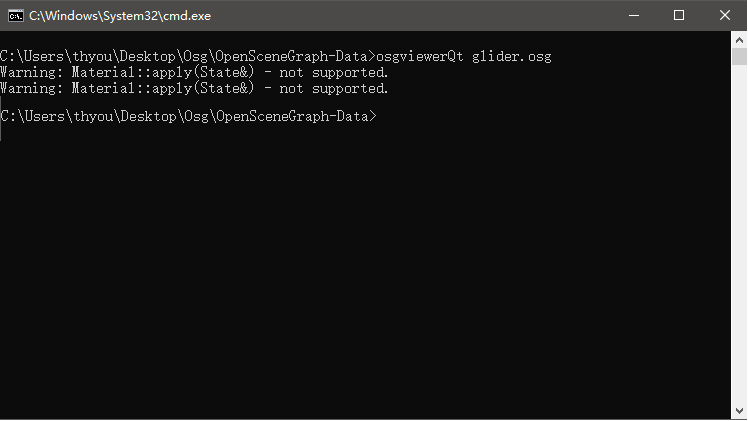
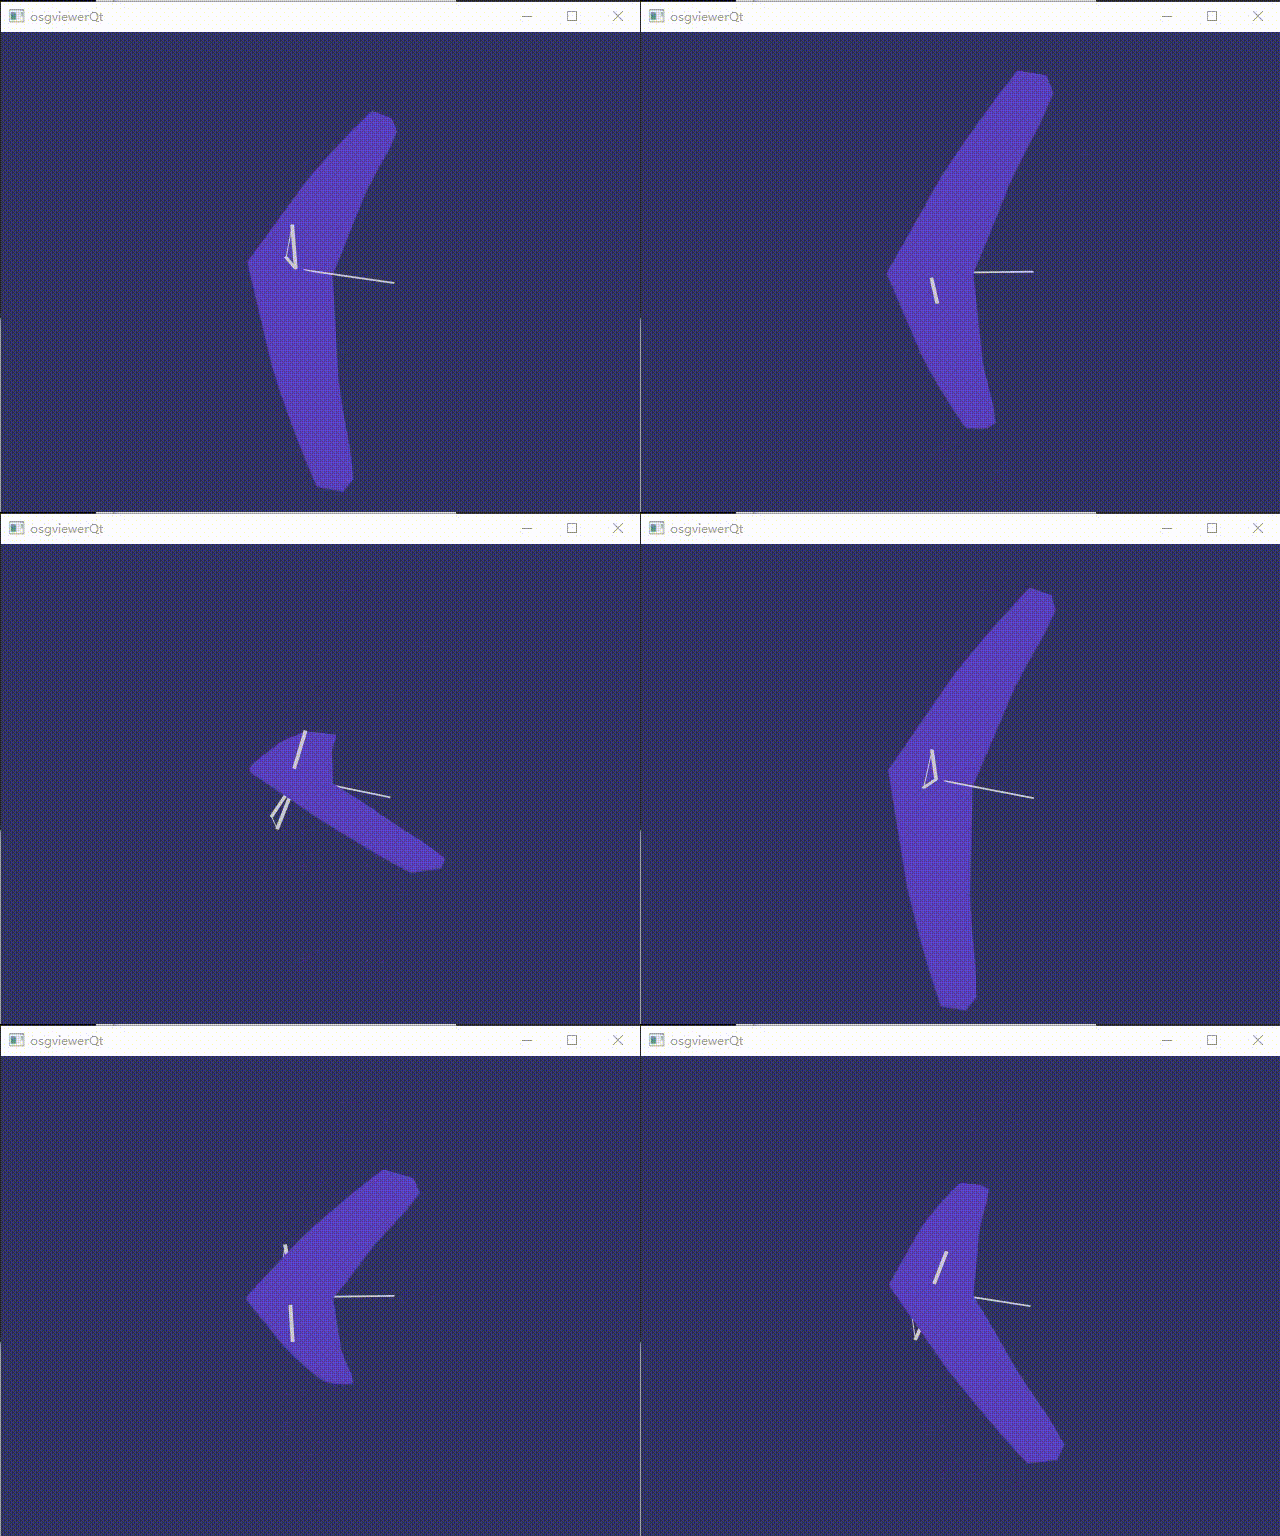
Then press Enter and the 3D view of the glider opens; at this point the build is verified.
IV. Conclusion
All of the builds are now complete.
The whole process took about four and a half hours. There were a few hiccups along the way, mostly to do with versions: always confirm that the versions of the third-party libraries being referenced are correct, otherwise functions turn up missing. The other point is to keep the libraries built along the way well organized and add them to the environment variables, so that later Cmake runs can find many of them automatically instead of configuring them one at a time, which saves a good deal of time and effort,
What follows is the project development itself: add the environment variables, reference the libraries and get on with development.